How to increase website speed with WP-Optimize plugin
Faster website speeds can play an important role in the success of your website. The faster your website’s speed, the higher it can rank in search engines; which can attract more visitors, reduce bounce rate and help increase visitor to customer conversions. As a website owner, the speed of your site should be right at the top of your priority list.
To increase website speed there are a few techniques you can apply, including image compression, caching and database optimization. There are no end of plugins available that can individually help compress your images, optimize the database and cache your site. In the past you would have needed to install a separate plugin for each of these tasks as there was no single plugin available that did all these jobs.
Thanks to WP-Optimize, this has now changed; You can now get all the above features in one handy plugin. No more headaches from using and maintaining several different plugins and hoping that they have no security problems. With WP-Optimize, you can just install a single, secure plugin on your website and increase your site’s speed dramatically.
Video tutorial: Increase WordPress site speed with WP-Optimize
Before using the WP-Optimize plugin
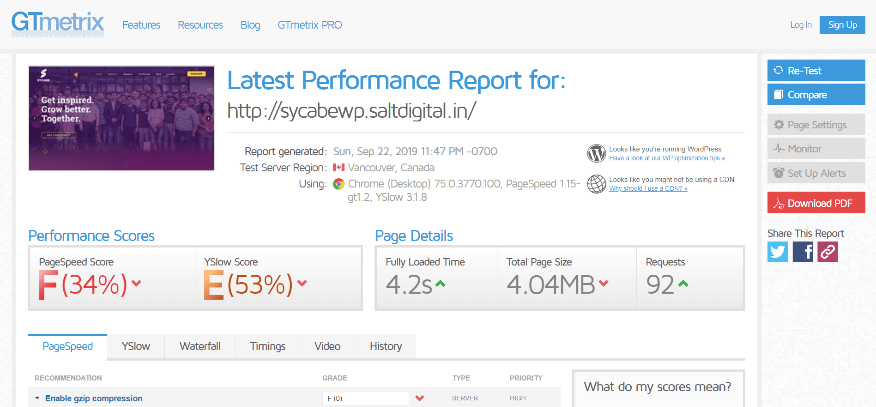
To measure the site’s speed before and after optimization on our test website, we will use the Google Pagespeed Insights and GTMetrix speed measuring websites. When our test website is run on these services before using the WP-Optimize plugin, we get the following scores.
Using the WP-Optimize plugin
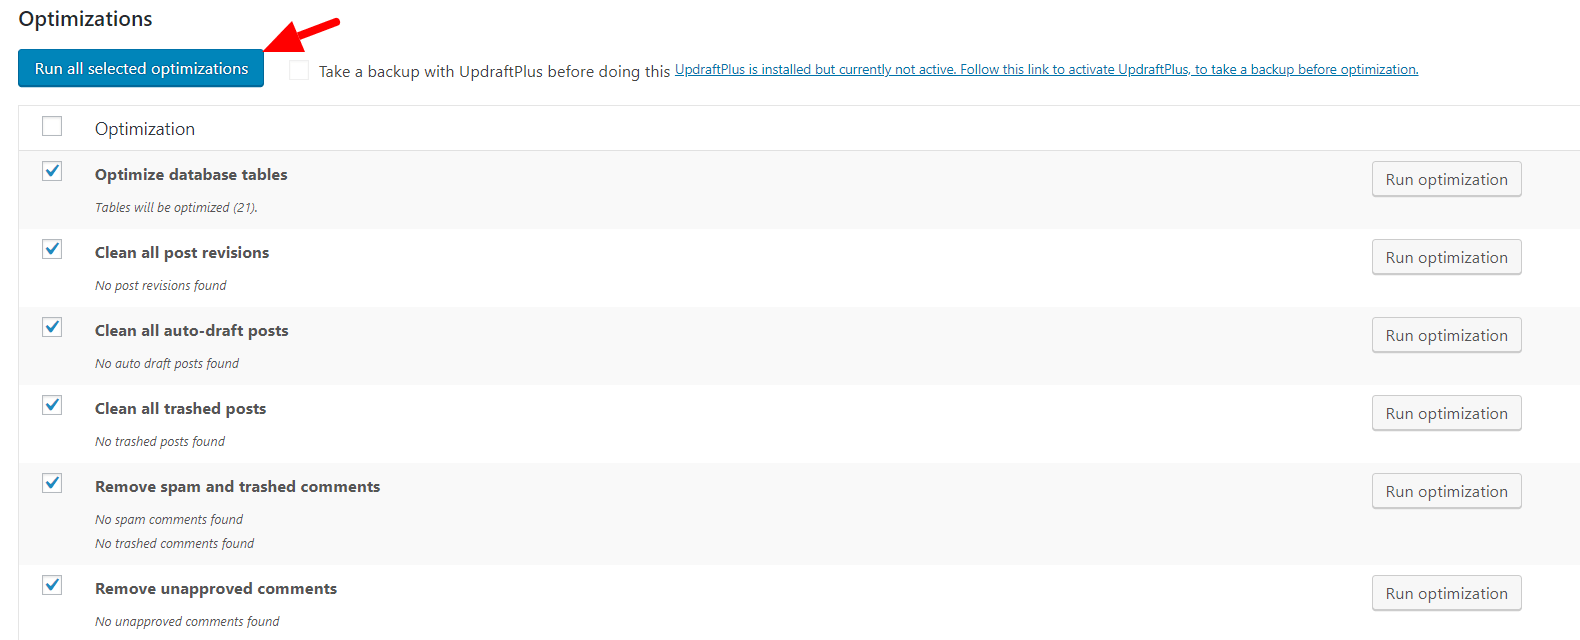
To start the optimization process, first install and activate the WP-Optimize plugin on your website. After activating the plugin, go to WP-Optimize->Database. You will find several default options selected by the plugin that should be optimized.
As with all optimization procedures, it is always recommended to first take a backup of the database backup before running the database optimization option. Once the backup is complete, press the ‘Run all selected optimizations’ button. The plugin will now start removing orphan records from your database, resulting in reduced database size and better server response time.
Next, head over to WP-Optimize->Images. Turn on ‘Automatically compress newly-added images’, to make sure any image you add later will be compressed. Under the compression options, you will find 3 choices where you can select your preferred compression choice. For the purposes of this test, we will choose the most popular option – ‘Prioritize retention of detail’, which saves space, but maintains higher image quality.
If you scroll down the page, you will find a list of your uncompressed website images. Image compression will reduce the size of the images, resulting in a smaller page size and thus a higher page speed score.
Click ‘Select all’ and then press the ‘Compress the selected images’ button.

The WP-Optimize plugin will start optimizing your images using the external service reSmush.it or Nitrosmush. You can choose either service from the ‘Show advanced options’ drop-down. By default, reSmush.it will be the service selected.
When you check the site score on Pagespeed Insights, you will notice the recommendation for ‘Defer offscreen images’ – the recommended lazy-load technique.
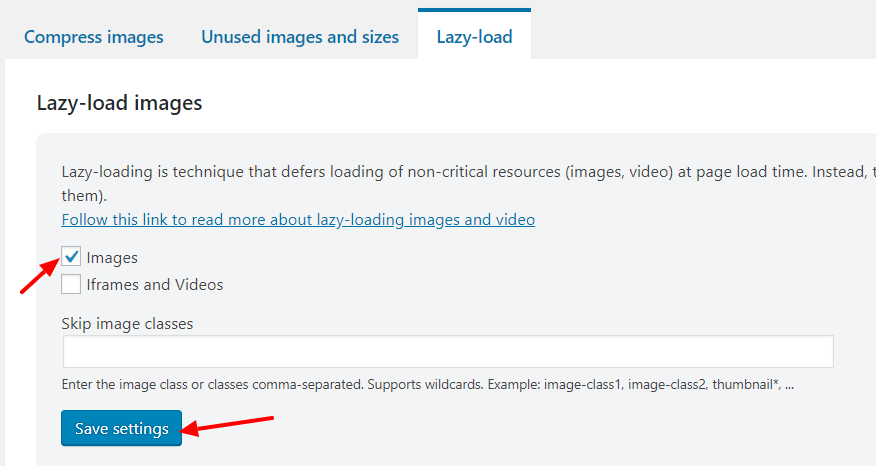
Lazy-load is a technique that defers the loading of non-critical resources (images, video) during page loading. These non-critical resources are instead loaded at the point when they are needed (e.g. when the user scrolls down the page). If possible, this technique should be employed as it will definitely speed up your website.
To enable this feature in WP-Optimize, go to the ‘Lazy-load’ tab and select the checkbox for ‘Images’ and ‘iframes and Videos’ (should you have any on your site) and press ‘Save settings’.
Next, set up the cache feature within WP-Optimize. To start, go to WP-Optimize>Cache. Within the ‘Page cache’ tab, turn on ‘Enable page caching’ and select the option for ‘Generate separate files for mobile devices’, if your website has a mobile specific theme.
Don’t forget to save the changes
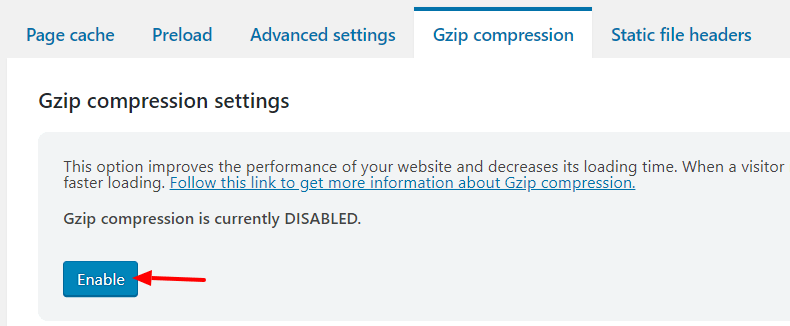
The following Gzip compression and static file caching should be done before enabling cache. Gzip compresses the requested resource before sending it, resulting in smaller file sizes and faster loading. Enable this option in the ‘Gzip compression’ tab.
Finally, enable the browser static file caching settings in the ‘Static file headers’ tab. By doing this, it advises a visitor’s browser to cache non-changing files for a period of time so that it doesn’t attempt to retrieve them upon every visit.
After using the WP-Optimize plugin
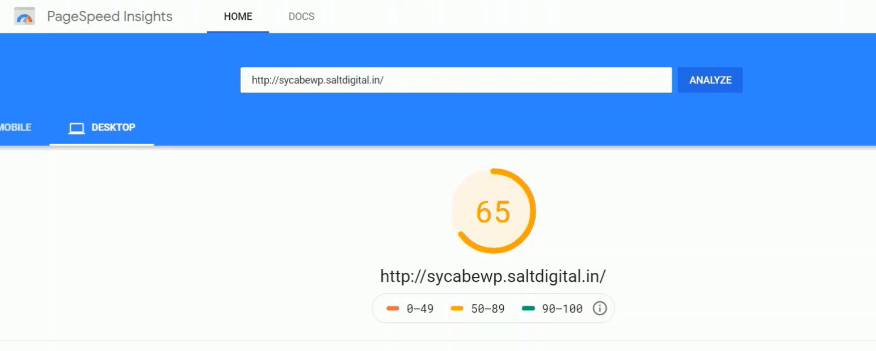
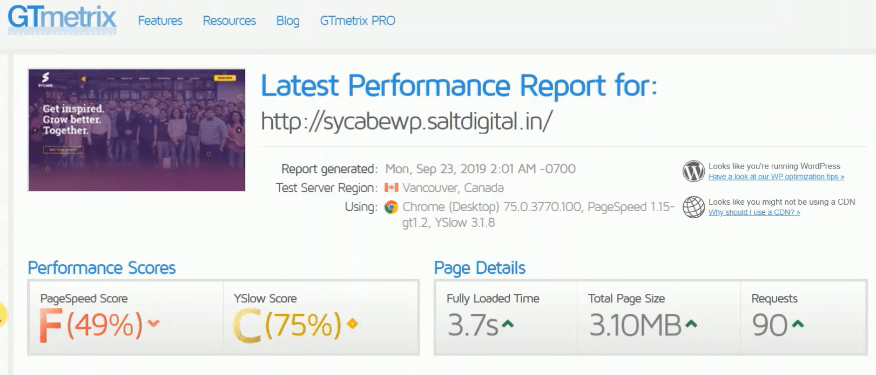
Now we are done setting up all the WP-Optimize settings, let’s check our test site’s speed score on Google Pagespeed Insights and GTmetrix again. This will evaluate your site’s performance and should give a better score compared to pre-optimization results.
Conclusion
With just these few optimization techniques, the test site’s Google page speed has improved from 48 to 65, while the GTmetrix score has improved the PageSpeed score from 34% to 49%, YSlow score from 53% to 75%, fully loaded time from 4.2s to 3.7s and total page size from 4.04MB to 3.10MB.
When it comes to WordPress, site optimization is a hugely important step to perform before your launch your site. A properly optimized site will not only give your visitors a better user experience, but also help you succeed online.
By using the WP-Optimize all-in-one plugin, you can get all the essential features needed for optimizing your WordPress website. Get a copy of WP-Optimize today and increase your website speed and let us know your feedback in the comment section below.




Recent Comments