by Mandy Kayat | Jul 16, 2024 | optimize images, Plugin News, WP Optimize
In this release we’ve added loads of new features and tweaks.
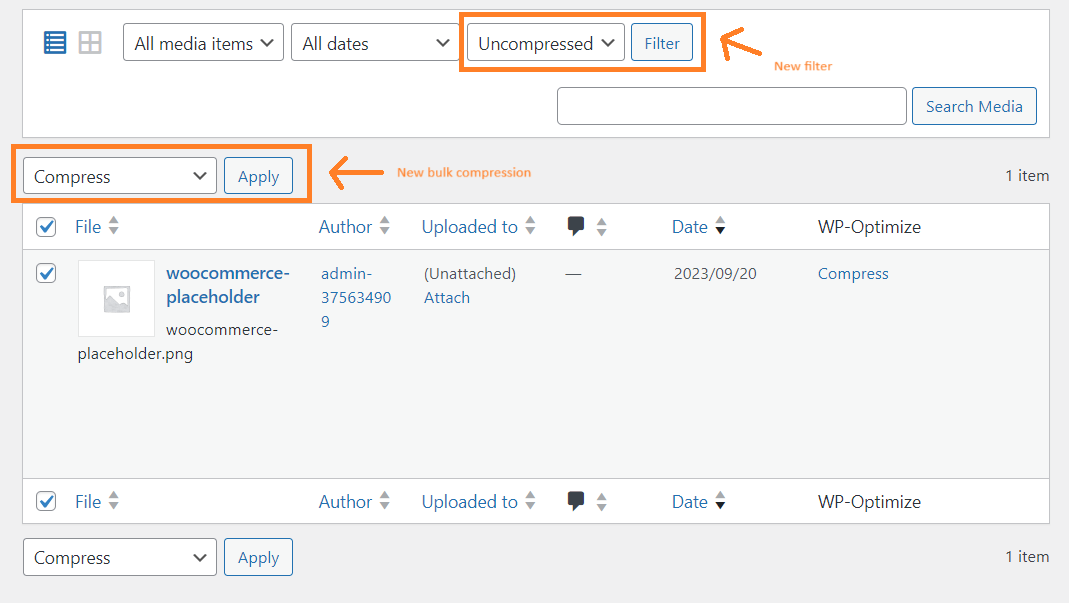
We’ve made some major improvements to image optimization. Premium users now have the ability to perform bulk image compression and restoration directly from the WordPress media library. In the past, this was only possible in the images tab. With this update, you can selectively restore multiple images or compress them in bulk, making it easier to manage your media files. We’ve also added a new filter in the media library that allows you to filter images by their compression status.
Free and premium users can also automatically delete old images when new scaled versions are created. WP-Optimize will use the scaled images instead of the original ones, saving disk space.
And you can now control how WebP images are served. Previously, the plugin automatically chose between .htaccess redirects and HTML alteration methods for WebP files based on your server type. With the new ‘wpo_force_webp_serve_using_altered_html’ filter hook, users can force WP-Optimize to use the HTML alteration method. This can help you avoid compatibility issues on certain hosting environments.
We’ve also made some general tweaks and updates. We will no longer minify CSS/JS files that are already minified by WordPress core or other plugins/themes to save on processing time. We also made sure that WP-Optimize is compatible with WordPress’s new script loading strategies.
Additionally, we updated the old codebase to use HeartBeat API instead of Ajax calls. HeartBeat API is built into WordPress and provides a more standard way for communication between the WordPress server and the browser. This change will help to reduce your server load and speed up your site. For sites that don’t use HeartBeat, we’ve included backups to keep things running smoothly.
We’ve added compatibility with the Curcy WooCommerce multi-currency plugin, which lets you easily manage different currencies on your e-commerce site.
Lastly, we’ve made several UI improvements for a better user experience.
For the full list of changes, please review the changelog below.
Changelog:
* FEATURE: Premium – Smush – Bulk compress / restore from media library
* FIX: Deactivate the form for minifying JS/CSS settings when the corresponding option is disabled
* REFACTOR: The functionality for the ‘Unused Images’ feature in ACF has been moved to a separate class
* TWEAK: Add UpdraftCentral commands for the latest WP-Optimize features
* TWEAK: Adjusted the scheduled preload time for improved performance
* TWEAK: Auto-update advanced-cache.php settings during site migration
* TWEAK: Cache – Human-readable file names for the cache directory
* TWEAK: Caching related cron jobs are activated even though cache is disabled
* TWEAK: Image compression – Updated message for restoring images action
* TWEAK: Implement Heartbeat API for image compression progress updates
* TWEAK: Improving vendor autoload
* TWEAK: Introduces a hook (`wpo_force_webp_serve_using_altered_html`) for changing WebP serving method
* TWEAK: Minify – Exclude .min files from minification
* TWEAK: Minify – Improve list of processed files UI
* TWEAK: Optimization of the get_uncompressed_image query
* TWEAK: Persist script loading strategy when minifying JS files
* TWEAK: Premium – Compatibility with Curcy WooCommerce multi currency plugin
* TWEAK: Premium – Unused Images – Added an option to delete original images when scaled versions exist
by Rebecca Faulkner | Jan 31, 2024 | optimize images
Table of contents
What is image optimization?
Image optimization means different things to different people.
For us, image optimization means reducing image size whilst retaining enough quality so that the images remain useful.
If an image is too compressed, its quality suffers. Not enough, and the file size will be greater than warranted.
We’ll do our best in this guide to deliver some practical advice on how you can optimize images for your WordPress site.
Does image optimization matter?
In a word, yes.
Lots of large images uploaded to your WordPress site takes up space on the server, which can be costly in shared hosting environments.
Large images also impact page load speed. Consider the following:
Imagine you have 10 images on your homepage . Each image is 1MB in size and so the total size of images for that webpage is 10MB.
Let’s imagine the page load time is 10 seconds.
By compressing each image to 100KB each, the total size of your homepage images is now just 1MB. Assuming other assets on that webpage are minimal, you’ve just reduced your webpage load speed to 1 second.
Page speed load times and SEO
Page speed load times have been a ranking factor in Google since 2010. Other ranking factors are weighted higher by Google (e.g page quality and relevance) but speed is still important, particularly from a user experience, engagement and conversion perspective.
The longer it takes for a user to open your webpage, the more likely they are to bounce out.
Resizing images in WordPress
Resizing images to make them smaller contributes to smaller file sizes. If images are high resolution and designed for print they’re almost certainly taking up more space on your site than they need to.
However, resizing images to specific dimensions simply isn’t required as WordPress will do this for you. WordPress creates three new versions for every image that you upload:
- Thumbnail size (150 x 150 pixels)
- Medium size (up to 300 x 300 pixels)
- Large size (up to 1024 x 1024 pixels)
It does this to help you ensure that the right image is used in the right location (e.g., thumbnails in blog feeds, large images in headers).
The argument there of course is you now have three versions (four, if you include the original) of every image you’ve ever uploaded to WordPress. If they’re not all in use, then they’re taking up needless space in your image library.
If you have WP-Optimize (premium version) you can scan your WordPress site for unused images, then delete them in bulk.
You already know that images come in different file formats (PNG, GIF etc.) but does the file format make a difference to file size?
For the most part, not really.
The difference in file size between JPEG, GIF and PNG is only about 2-5%. Choosing the right file format is about functionality more than file size – Kowsar Hossain, Developer at WP-Optimize
- JPG is suitable for most images.
- PNG should be used for images e.g. logos that require transparency.
- GIF should be used for animated images.
- SVG should be used for logos, icons, and other images that require scalability.
The exception to the rule is WebP.
According to Google, WebP images are 26% smaller in size compared to PNGs and 25-34% smaller than comparable JPEG images.
WebP can now be used in most cases, certainly in place of PNG or JPGs. First launched in 2010, WebP is now supported by 97% of browsers.
If you’re a developer, you can convert to WebP by downloading Google’s WebP conversion tool for Linux, Windows or macOS or by using a free WordPress plugin like WP-Optimize.
Image compression
The main way to optimize images is through image compression which you can achieve with stand-alone tools like TinyPNG.com.
The downside to stand-alone image optimization tools is you’ll need to upload every image one-by-one to optimize them all. You’ll then need to upload the optimized images back into your WordPress image library.
How to optimize images in WordPress
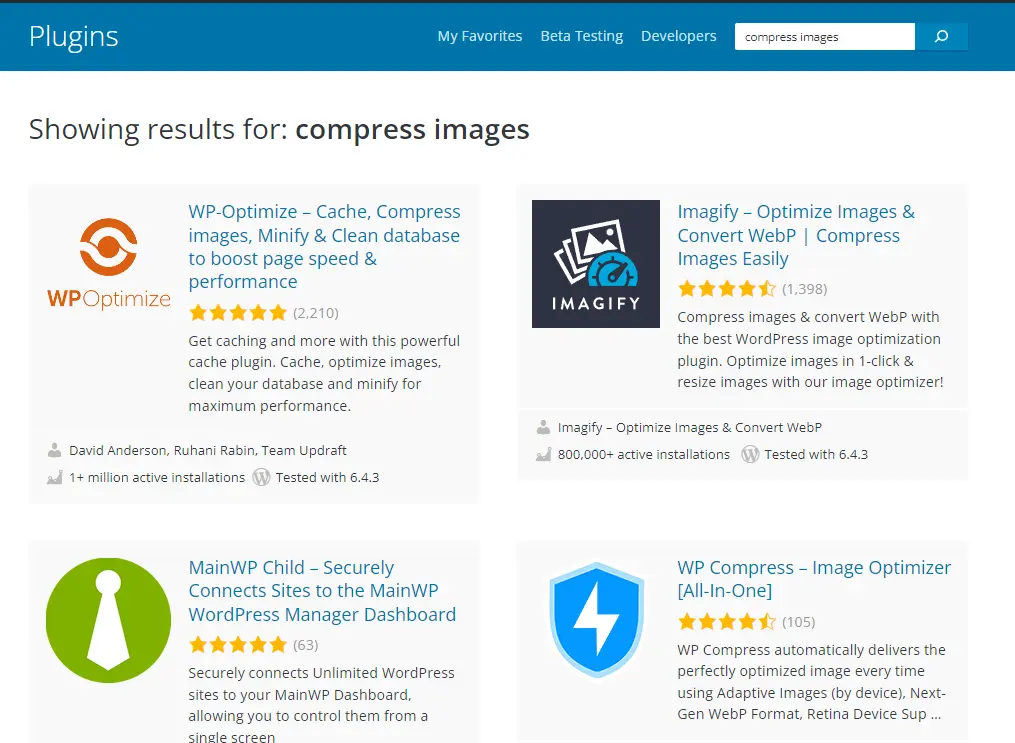
You can compress new images and images already in your WordPress image library by installing an image optimization WordPress plugin from the WordPress Plugin Directory.
Look for one with a high number of active installs and a 5-star user rating.
Optimizing new images from the WordPress image library
If you choose WP-Optimize, you can optimize new images directly from the image library once the plugin is installed.
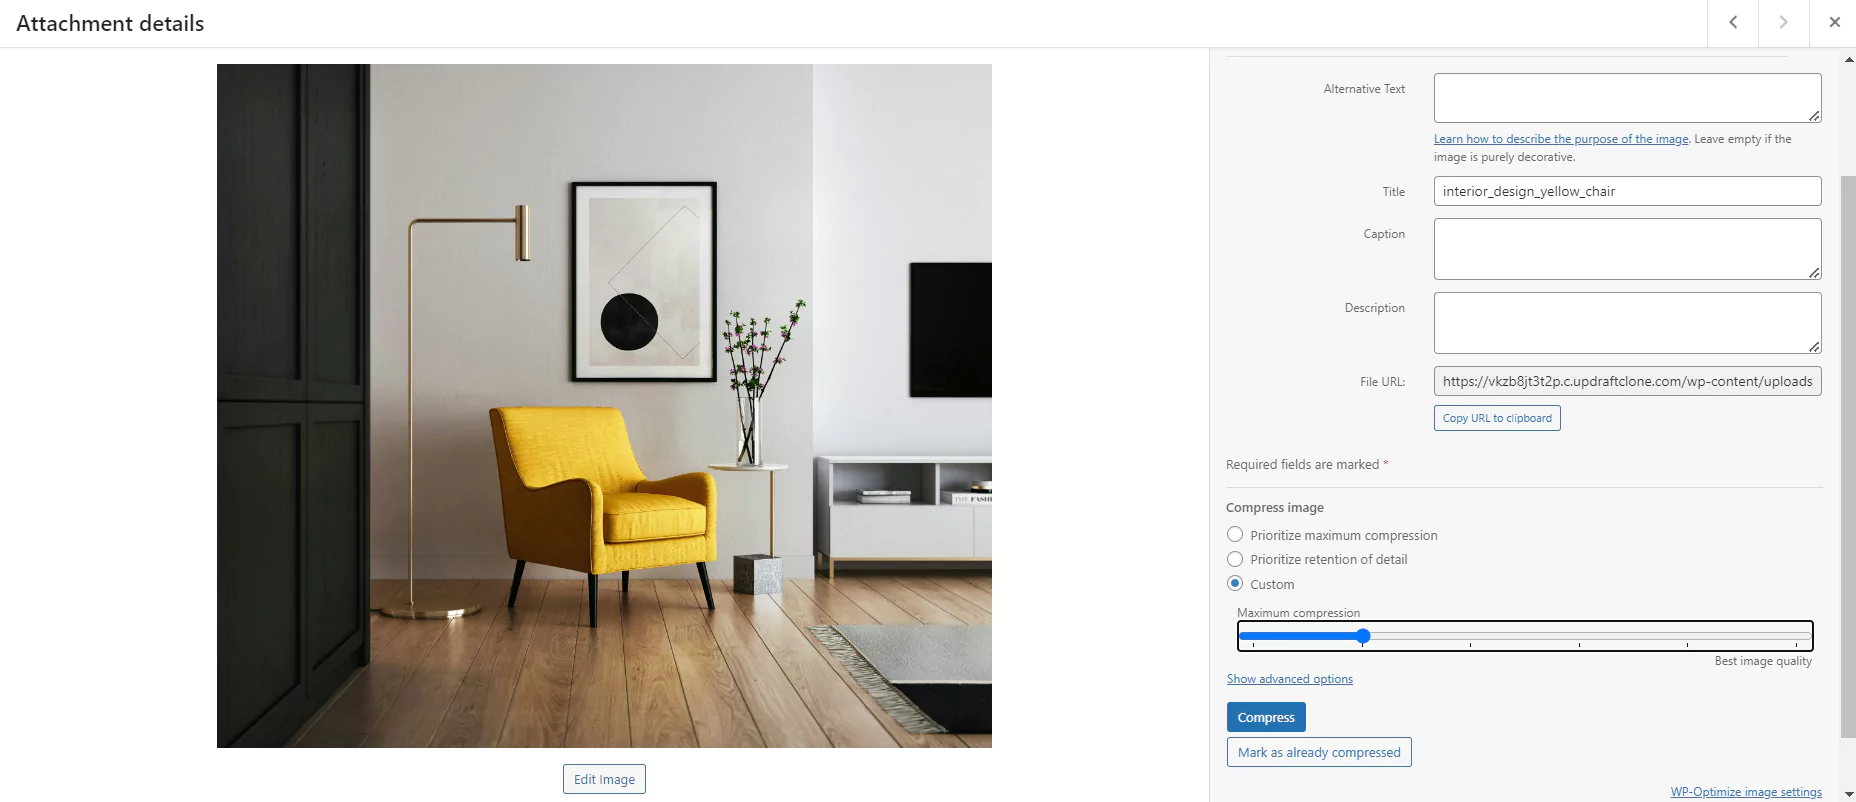
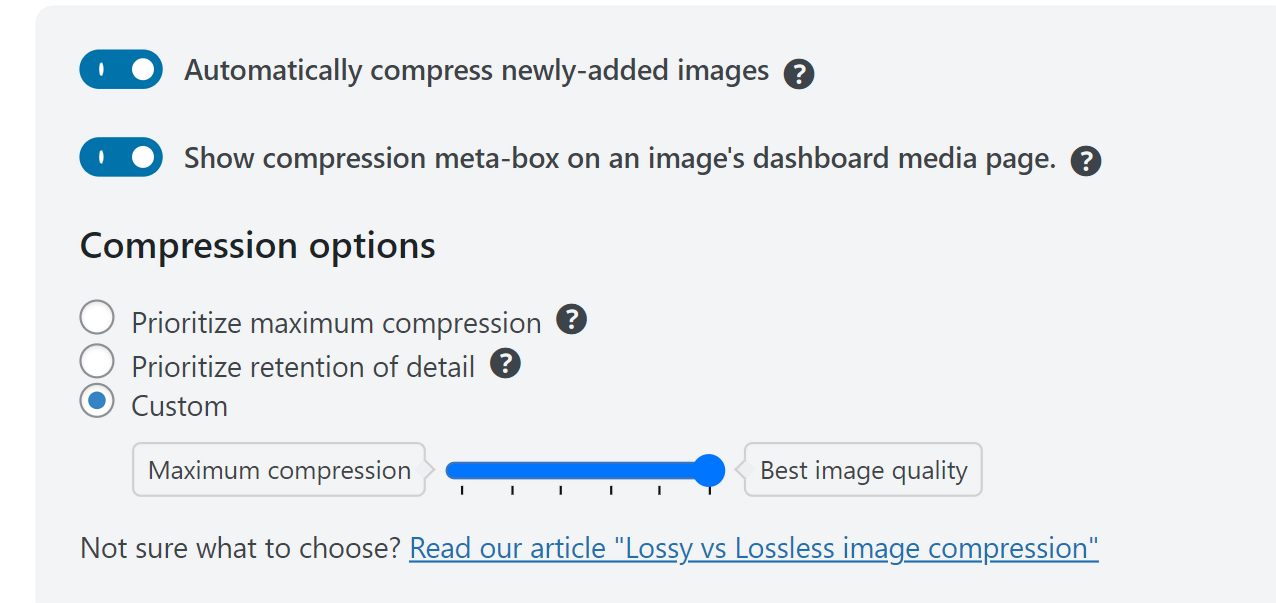
Choose between prioritising ‘maximum compression’ or ‘retention of detail’ or use the slider to choose somewhere in between.
Select ‘Compress’.
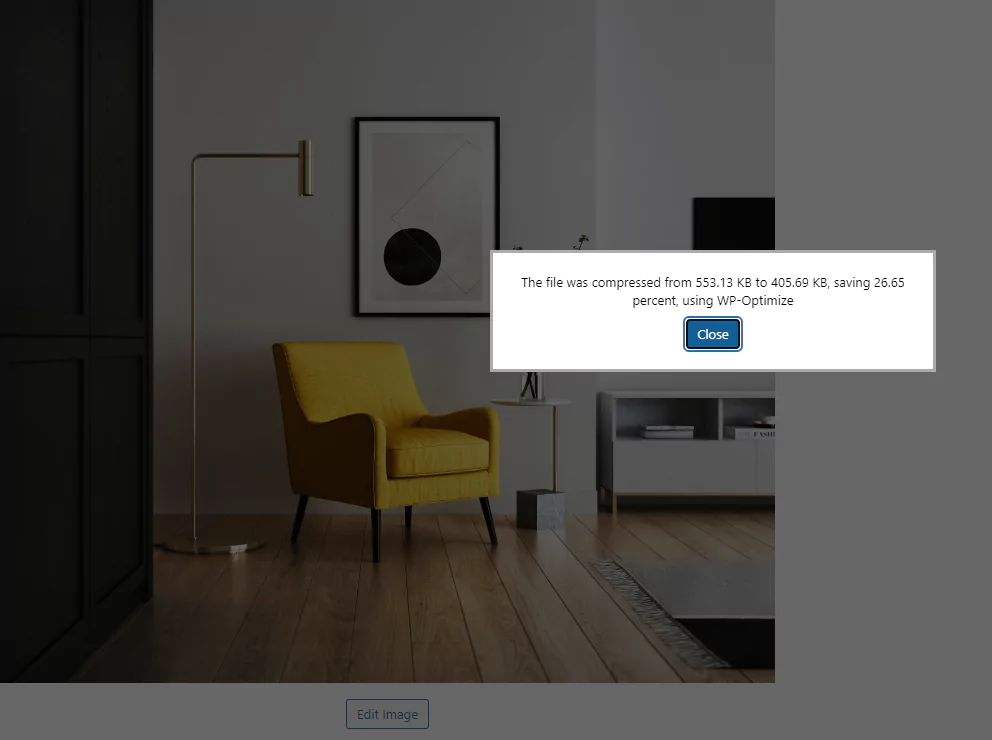
A message is displayed to let you know how much space you’ve saved by optimizing the image:
Optimize new images automatically
You can also tell WP-Optimize to optimize newly added images automatically and set your preferred compression options under WP-Optimize > Images > Compress images.
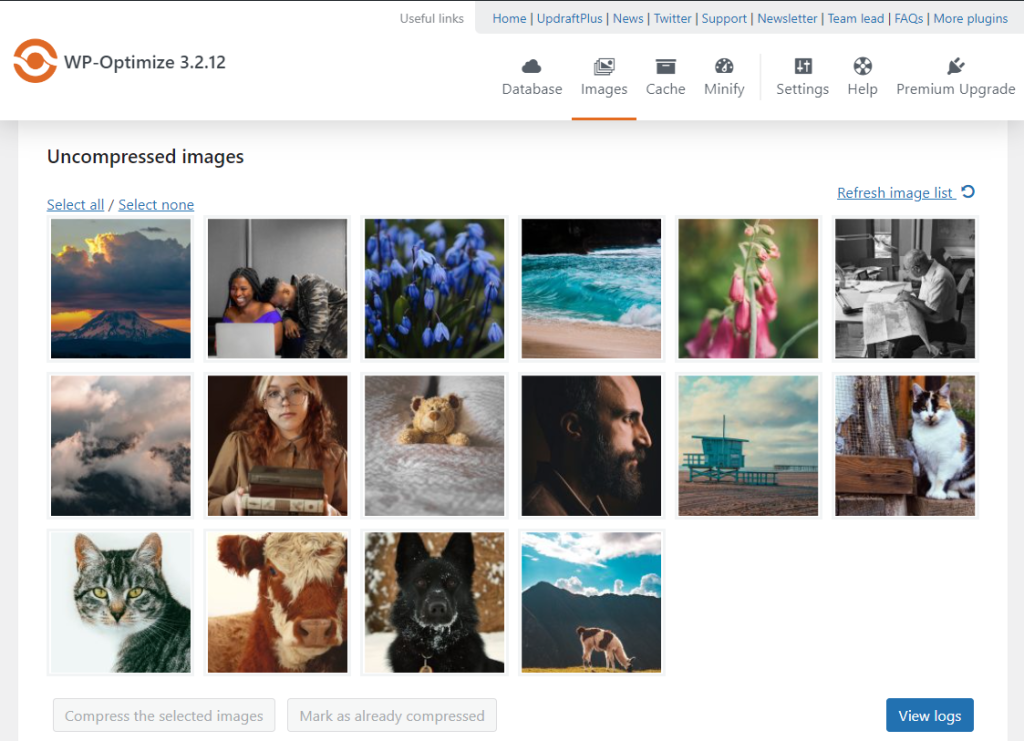
Optimize images in bulk
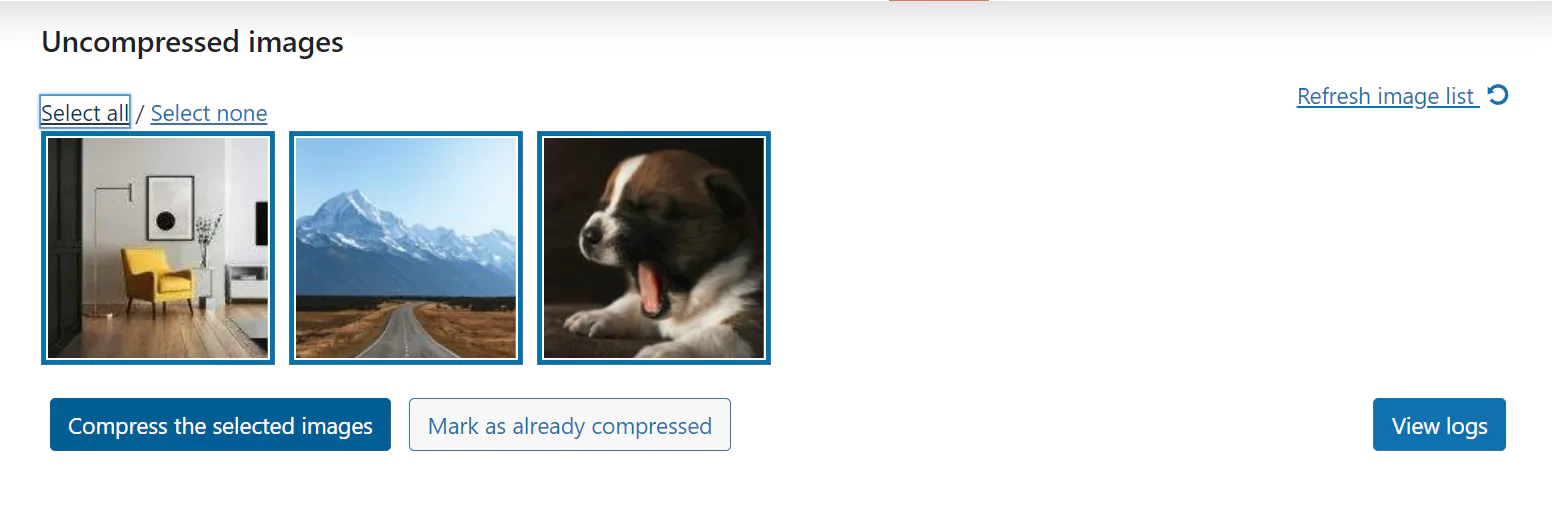
You can use WP-Optimize to see every uncompressed image on your site. Select some or all and then ‘Compress the selected images’.
Converting images to WebP
As mentioned earlier, WebP images are 26% smaller in size compared to PNGs and 25-34% smaller than comparable JPEG images, at a similar quality output.
If you check the box ‘Create WebP version of image’, WP-Optimize will create the WebP image format as part of the compression process for even smaller file sizes.

Retaining EXIF data
EXIF data contains information about photographs taken by digital cameras and devices. It includes details like when and where the photo was taken and other technical details. You can retain EXIF data under ‘advanced options’ or leave the box unchecked to have it removed.
For additional image optimization features, like the ability to identify orphaned (unused) images on your WordPress site or for features like Lazy Loading, consider installing WP-Optimize Premium.
Summary / conclusion
Image optimization means reducing image size whilst retaining enough quality so that the images remain useful.
Resizing images to the required dimensions isn’t required as WordPress will do this for you. We think the answer to ‘How to optimize images in WordPress’ lies in image compression and converting image formats like JPEG and PNG to WebP. Stand-alone tools like TinyPNG can do this for you but it can be more efficient to use a WordPress plugin like WP-Optimize.
How to Optimize Images for WordPress – Frequently Asked Questions (FAQ)
How do I optimize an image for a website without losing quality?
Choose a WordPress plugin that allows you to choose between maximum compression and maximum quality (or somewhere in between).
Does WordPress automatically optimize images?
Not really. WordPress automatically creates three new versions of every uploaded image to different dimensions (thumbnail, medium and large) but it won’t optimize (compress) images for you or help you to reduce their file size.
What is the best image optimization plugin for WordPress?
WP-Optimize is the highest rated and most popular image optimization plugin on the WordPress plugin directory.
Can I optimize my images for WordPress without a plugin?
Yes. Try tools like TinyPNG or Squoosh.
How do you optimize images already uploaded to WordPress?
A WordPress plugin is the best way to optimize images already in your media library.
by Barbara Saul | Jan 19, 2021 | optimize images
Post updated: 7th February 2023
Websites can accumulate hundreds, if not thousands of images over time. Images in their original uncompressed format can slow your website down, impacting user experience, bounce rate, and SEO performance.
This article outlines how to improve the speed of your site by optimizing images using WP-Optimize.
WP-Optimize ‘Free’ or Premium?
Image compression is included in both packages but when it comes to page load speed and SEO, every little bit helps.
Premium features includes ‘Lazy load’, which loads only parts of a web page that are visible to the user, allowing a page to load much faster. Additional benefits of Premium include multi-site support, scheduling so you can ‘set and forget’ and premium support. You can find out about the benefits of WP-Optimize Premium here.
How to optimize your images
Step 1
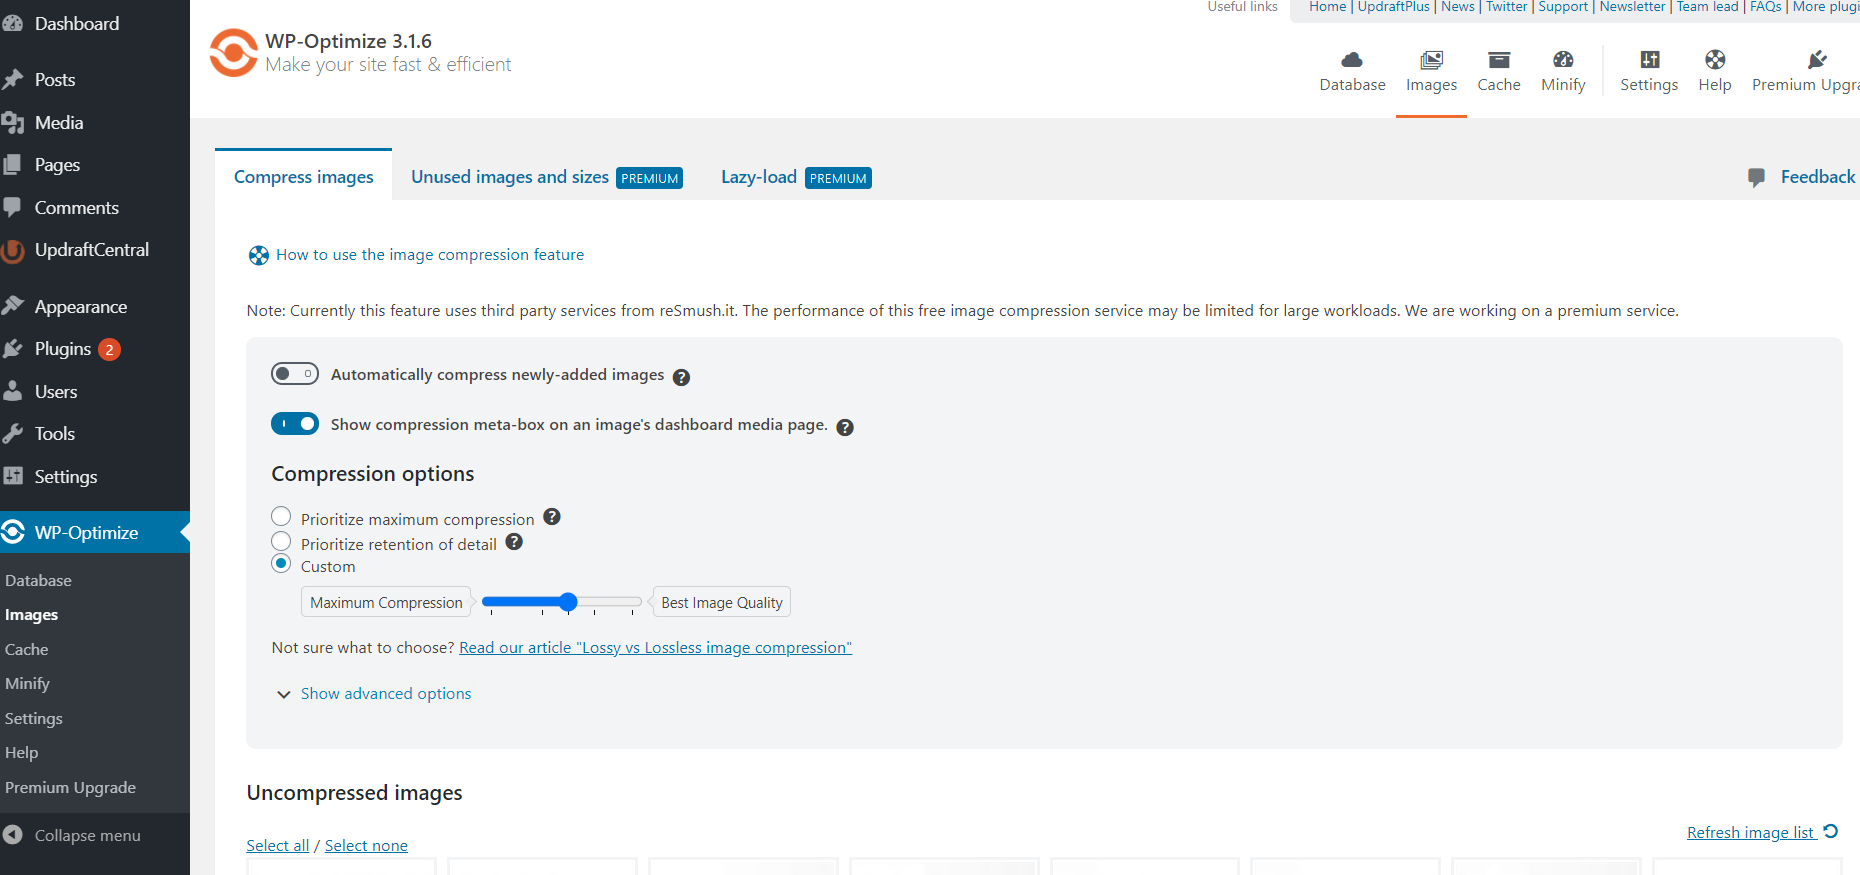
Once you have installed the WP-Optimize plugin, go to WP-Optimize > Images in your WordPress dashboard. Now you can decide what level of compression you want for your images. There are three options:
- Prioritize maximum compression
- Prioritize retention of detail
- Custom
You’ll save the most space by selecting “Prioritize maximum compression“. This compresses your images, making them smaller and quicker to load, and as a result, your WordPress site will load faster. However, if you run a wedding photography website, for example, you may not want to compress your images fully, as there can be a slight drop in image quality the more an image is compressed. While the loss in quality is hardly noticeable for most people and is not a consideration for most websites, if high-end quality images are essential to you, then you should select “Prioritize retention of detail“. This option will still reduce the image file size (though not as much as ‘maximum compression’) but will maintain the high quality of the original image. You can also select “custom“, if you would like to format your images to a level that is not quite maximum compression or best image quality.
Step 2
Below the settings options, you will see all the Uncompressed images uploaded to your website. Here, you can manually select individual images you wish to compress or press the “Select All” button if you want to compress all the images to the same level. As previously mentioned, if you have high-quality images that you do not wish to fully compress alongside other images that may not be as important, you can individually select them and run a ‘maximum retention of detail’ compression. You can then run the ‘maximum compression’ option on the remaining images.
Step 3
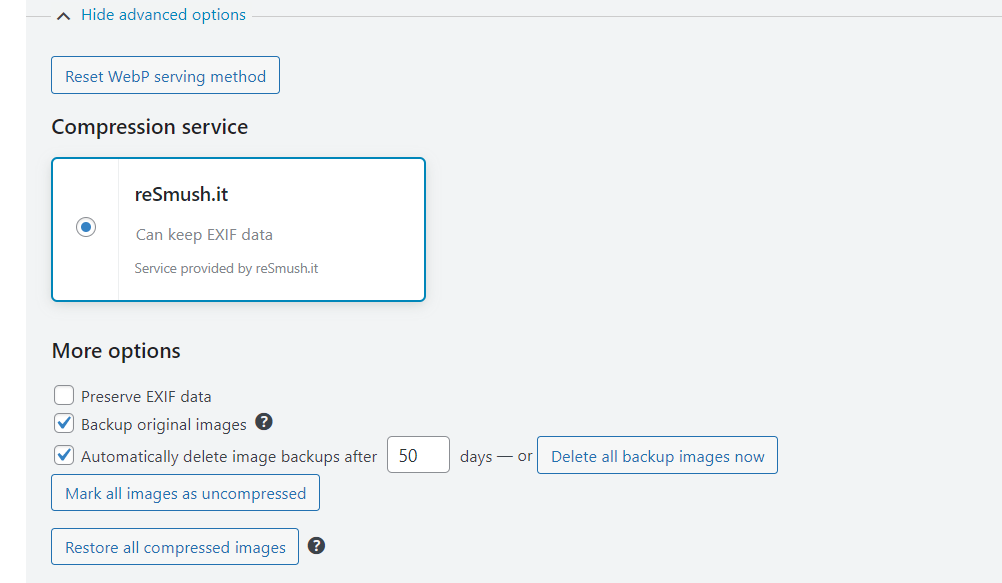
WP-Optimize also gives you ‘advanced options‘ when compressing your images. Here you can choose options such as:
- Preserve EXIF data – Handy for professional photographers that may require the EXIF data at a future date.
- Backup original images – Don’t worry if you make a mistake or want to revert to the original image. WP-Optimize gives you the option to retain a backup.
- Automatically delete image backups – Once you have compressed your images, you can set a date for when you want your backup images deleted. This helps prevent your site from storing large original files that are no longer needed.
- Delete all backup images now – If you are happy with the results and want to delete all your backed-up images, press this button, and WP-Optimize will do the rest.
- Mark all images as uncompressed – Use this option if you want to compress your images again or make further changes.
- Restore all compressed images – If you decide that you no longer want your images compressed or have made a mistake and still have the original in your media library, you can restore all of your compressed images to their original state.
Step 4
Once you have set up and decided what kind of image compression you are happy with, you can tick the “Automatically compress newly-added images” button so that you do not have to go through the process every time you upload a new image. Once you activate this option, every new image you upload will be compressed according to your chosen settings (compression or detail).

If you would like to read more information on the benefits of compression versus detail, check out the following blog that goes into more detail and explains the benefits of both: Lossy vs Lossless image compression – A guide to the trade-off between image size and quality.
We have also put together a video of how to optimize your images:
A version of this article was initially posted on the UpdraftPlus blog as “How to use WP-Optimize image compression.”
Recent Comments