How do I use WP-Optimize caching?
For a detailed walk-through on how to use the WP-Optimize caching feature, we put together a video that takes you through all the necessary steps:
For a detailed walk-through on how to use the WP-Optimize caching feature, we put together a video that takes you through all the necessary steps:
If you activate 2 caching plugins (or at least the functionality) at the same time, this might cause a fatal error and break your site.
Follow these instructions to recover your site:
wp-config.php.define('WP_CACHE', true);, delete it, save the file and upload it back via FTP.wp-content and delete the file advanced-cache.phpIf the error comes back before you had a chance to do this:
wp-content/plugins, and rename the folders of all caching plugins (for example by adding a -).wp-content/plugins, and rename the folders of all caching plugins back to their original names.This can be changed by hooking into the filter wpo_purge_cache_hooks. E.g.
// Add a new action that will trigger a cache purge
add_filter( 'wpo_purge_cache_hooks', function( $actions ) {
    $actions[] = 'my_custom_action';
    return $actions;
} );
Installing the WP-Optimize plugin is as easy as 1-2-3. Here’s a quick guide to get you started.
Table of contents:
In order to install the free version of the WP-Optimize plugin:
1. Log in to your WordPress admin dashboard.
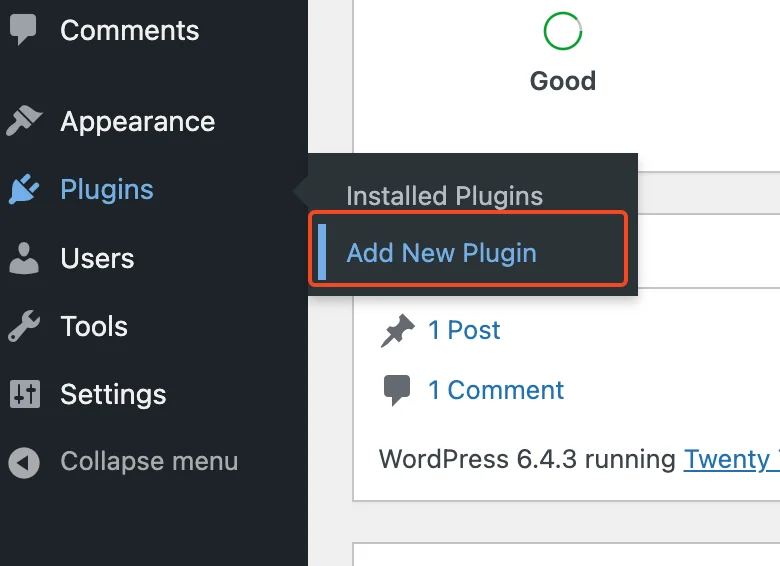
2. In the left-side menu bar, navigate to Plugins and click on Add New Plugin.
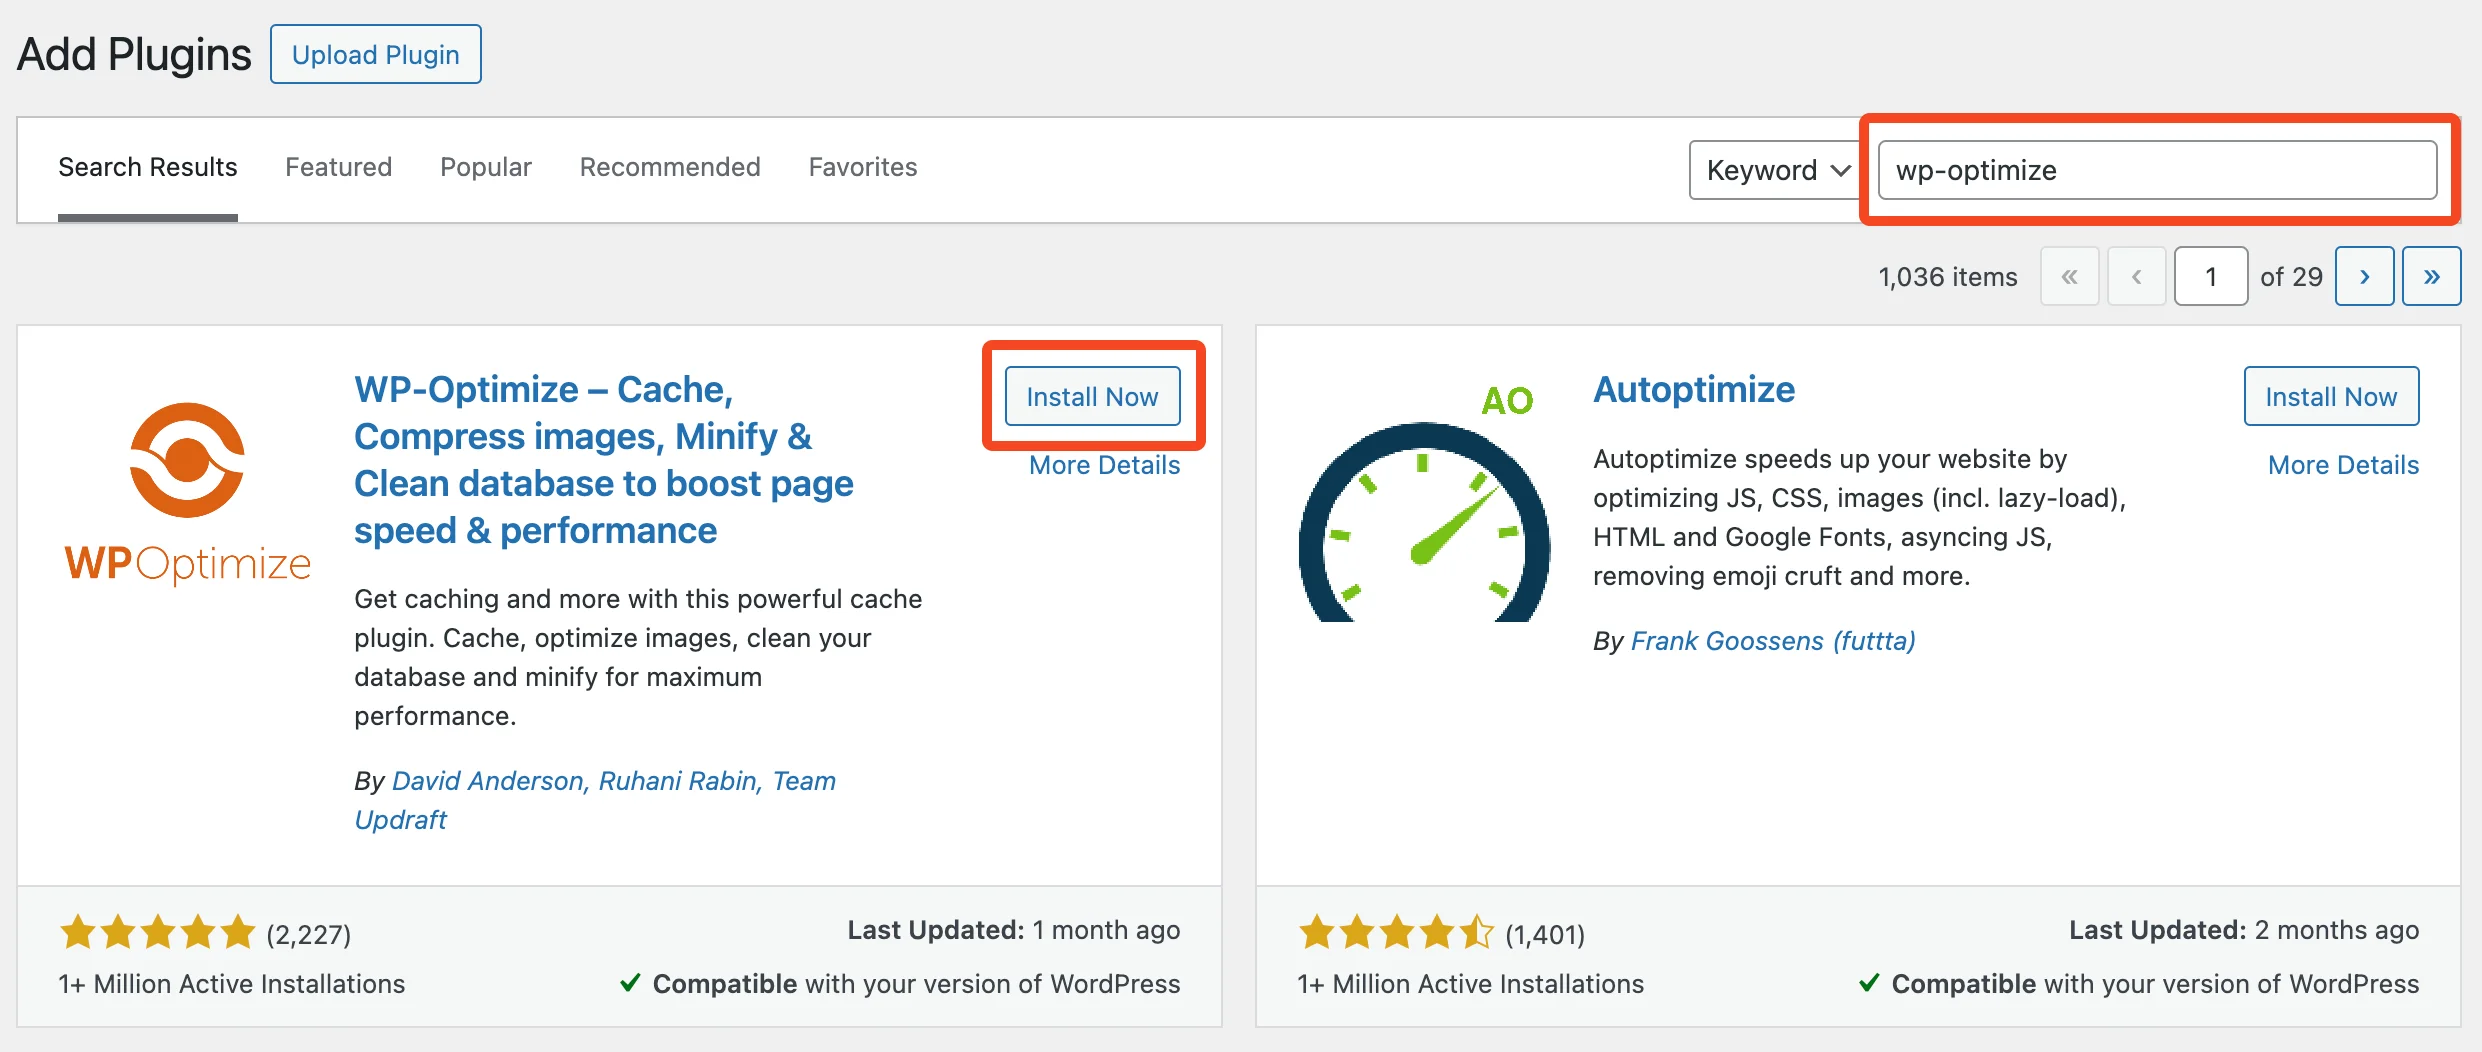
3. Search for ‘WP-Optimize’ using the search bar on the top right corner of your screen.
4. Look for the WP-Optimize plugin and click Install Now.
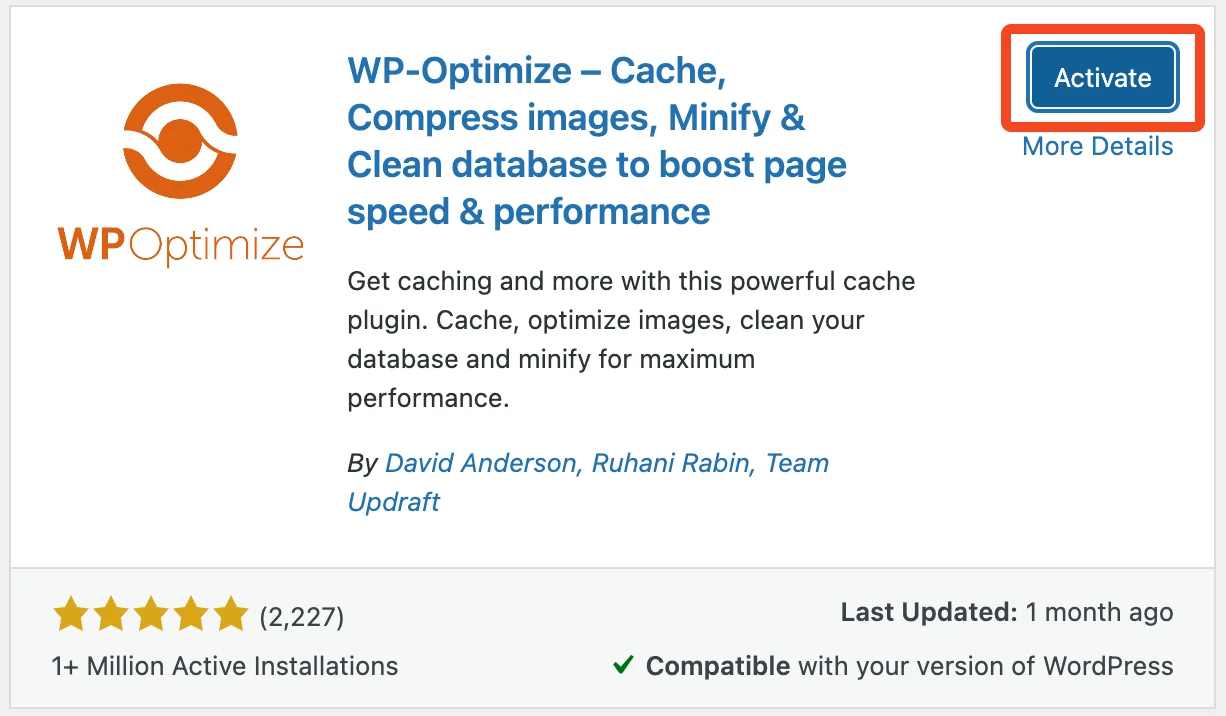
5. Once the installation is completed, click on the Activate button to activate the plugin.
Once you have installed and activated the free version of WP-Optimize, you can learn how to set it up and for current and future use in just a minute or so. By setting up and carrying out these tasks, it can help your site to improve its speed and ranking score, as slow sites will suffer badly in search engine rankings if they are not routinely optimized.
Just follow the simple instructions in the below video to help continually optimize your site’s databases, images, caching and minify settings using the free version of WP-Optimize.
If you already have the free version of WP-Optimize installed on your website, you don’t need to worry about anything as it will be automatically deactivated.
You also don’t have to install the free version to run WP-Optimize Premium.
To download and install WP-Optimize Premium on your WordPress site, just simply:
1. Go to our website to buy the WP-Optimize Premium plugin.
2. Download the WP-Optimize Premium from the link in your confirmation email or from your Account page.
3. Log in to your WP admin dashboard, then go to Plugins > Add New Plugin.
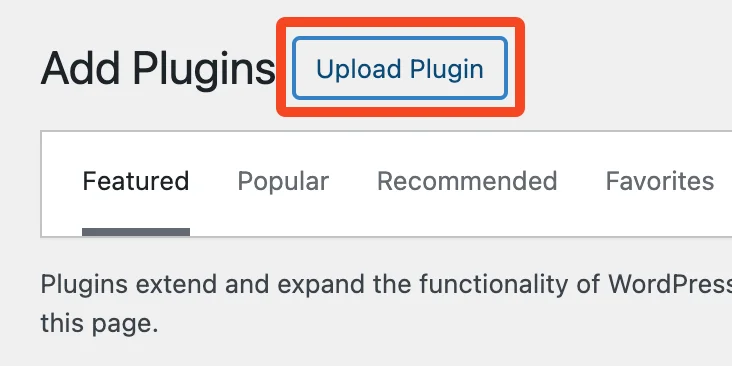
4. Press the Upload Plugin button near the title at the top of the page.
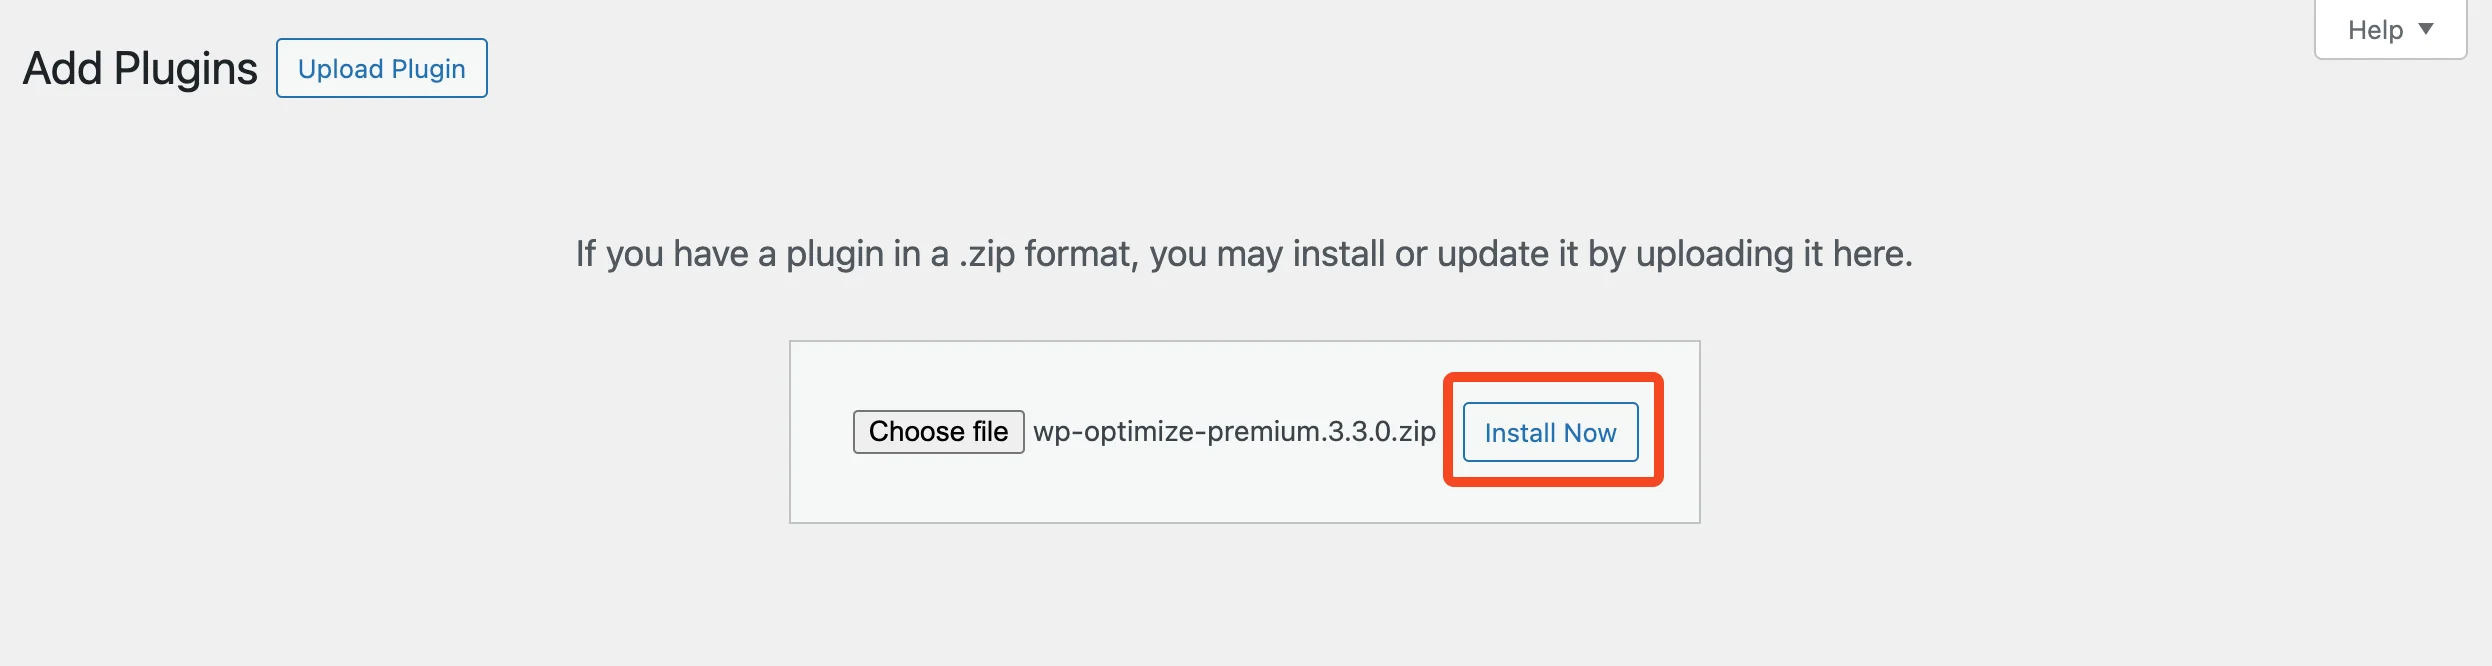
5. Click on Choose file and select the WP-Optimize Premium plugin file that you downloaded.
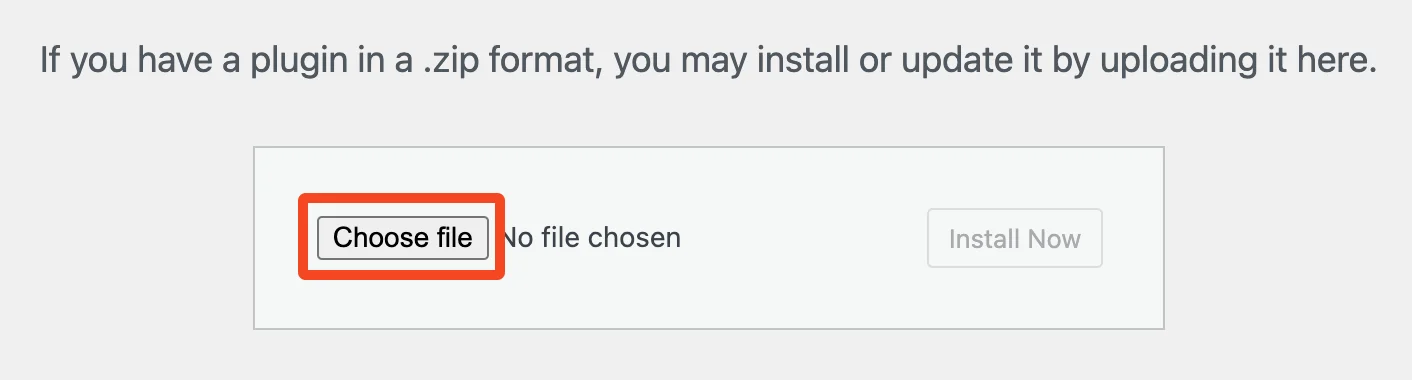
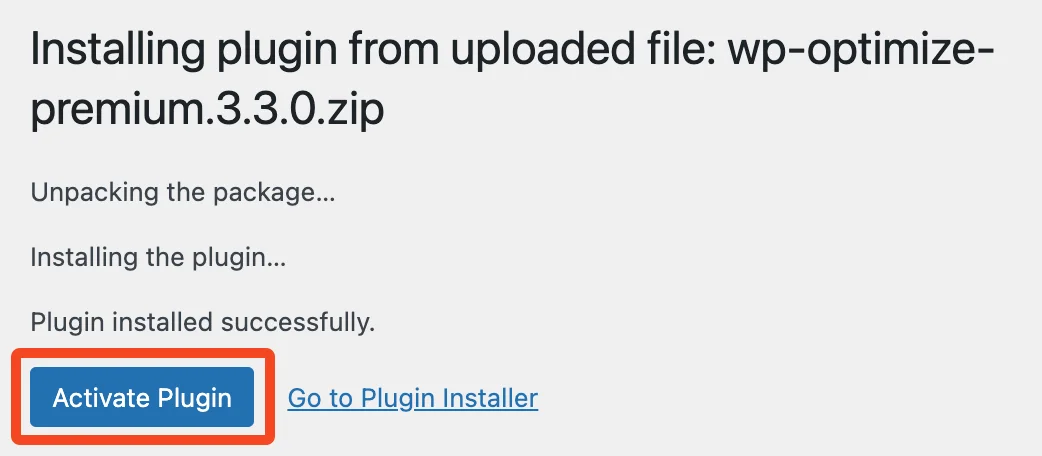
6. Upload and install the plugin by clicking on the Install Now button.
7. Click on Activate Plugin to activate WP-Optimize Premium.
You’ll be prompted to enter your WP-Optimize credentials to link your site to licences. This will verify your purchase and enable the plugin to receive automatic updates. Enter the required details and click Connect.

Feel free to address any doubts regarding the purchase by submitting a pre-sale question. We are here to assist you at every step of your journey.
You can also refer to our FAQs page for assistance with any issues or inquiries that may arise.
Still haven’t found the information you need? Premium customers can get help from our expert developers through the Customer Support Form. We answer 94% of inquiries within 24 hours!
WP-Optimize is compatible with all web servers, including:
However, only Apache makes it possible for a WordPress plugin to turn on Gzip compression and static caching headers; thus, on other webservers, WP-Optimize can only test and advise whether these beneficial features are active, but cannot itself turn them on.
Recent Comments