WP-Optimize vs. WP Fastest Cache: Which is the best WordPress cache plugin

 Updated on: 28/10/2024

There are plenty of WordPress cache plugins, but two of the top contenders are WP-Optimize and WP Fastest Cache. With over a million installations each, these are two plugins that people definitely trust to improve their site’s performance.

Caching and optimization plugins are key to speeding up your website and improving SEO. That’s where WP-Optimize and WP Fastest Cache come in, but how do they compare? Both are all-in-one performance solutions, but they each have varying features and are ideal for different types of users.

In this article, we’ll take a close look at these two popular performance-enhancing plugins. Breaking down their various features, ease of use and value for different kinds of users will help you figure out which one fits your needs.

WP-Optimize vs. WP Fastest Cache: Key features

Feature WP-Optimize WP Fastest Cache
Page caching One-click page caching is a core feature of the free version. Upgrading to premium gets you user/role cache, geolocation caching and advanced cache purging rules.
Includes page caching in the free version, though user and role-based caching or geolocation caching isn’t available.
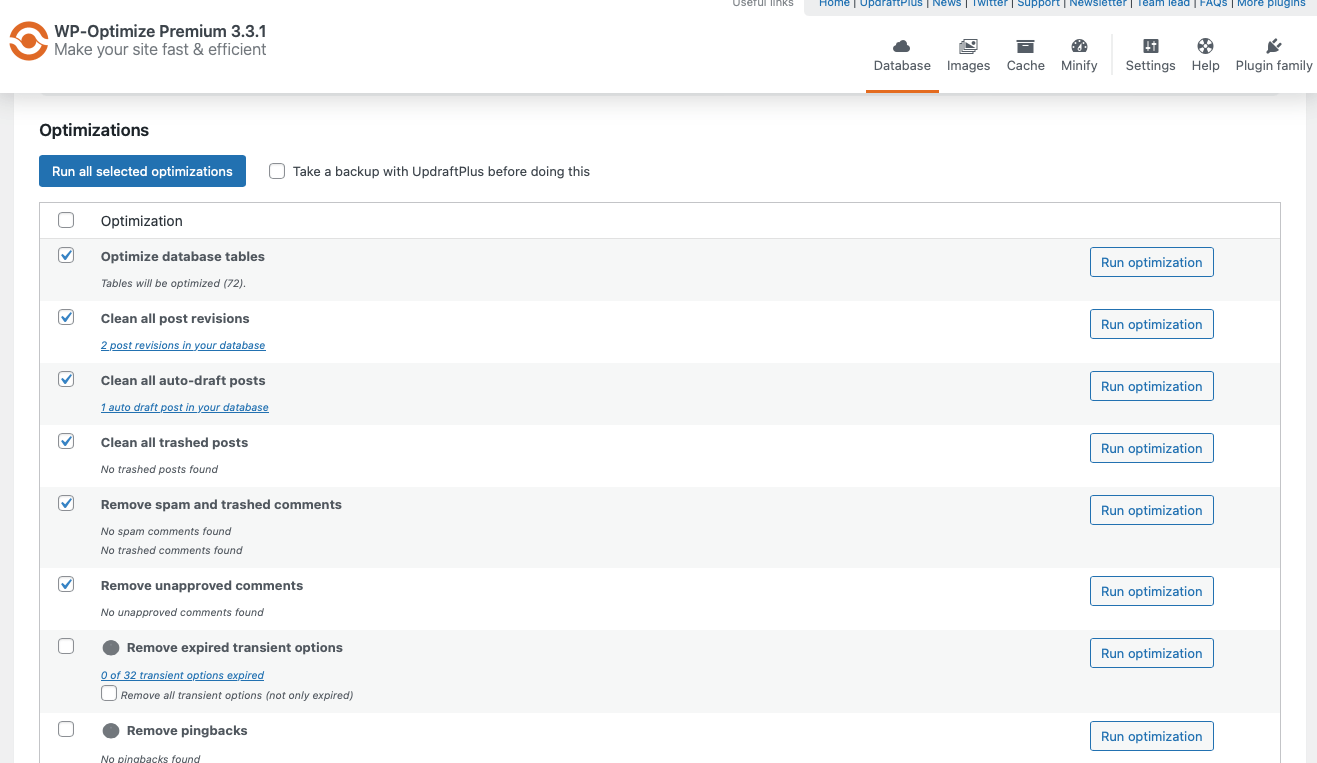
Database optimization WP-Optimize’s database cleanup tool is one of its best features, and you can use it for free. It cleans up unnecessary data to keep your site fast.

Includes a similar database optimization feature, but only in the premium version.
Minification (HTML, CSS, JS) Minifying HTML, CSS, or JS with WP-Optimize is easy. The reduced file size greatly improves loading times. You can minify HTML and CSS with the free version of WP Fastest Cache. But it doesn’t work as well unless you buy the premium version. You also can only minify JS in the premium version.
Image compression and WebP conversion Compressing images and converting them to WebP is a free feature in WP-Optimize. WP Fastest Cache includes image optimization and WebP conversion, but only in the premium version.
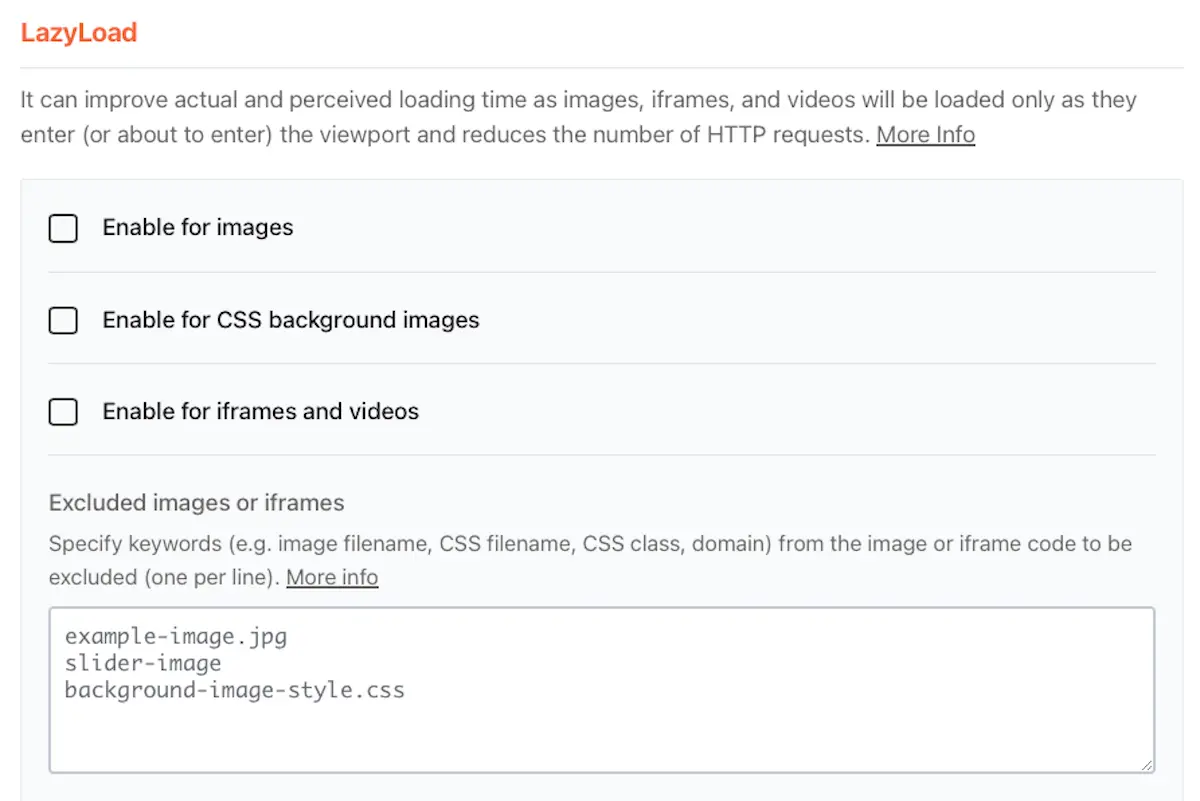
Lazy loading Lazy load is a premium feature of WP-Optimize. Images are only loaded when you scroll down to them. Lazy load is also a premium feature of WP Fastest Cache
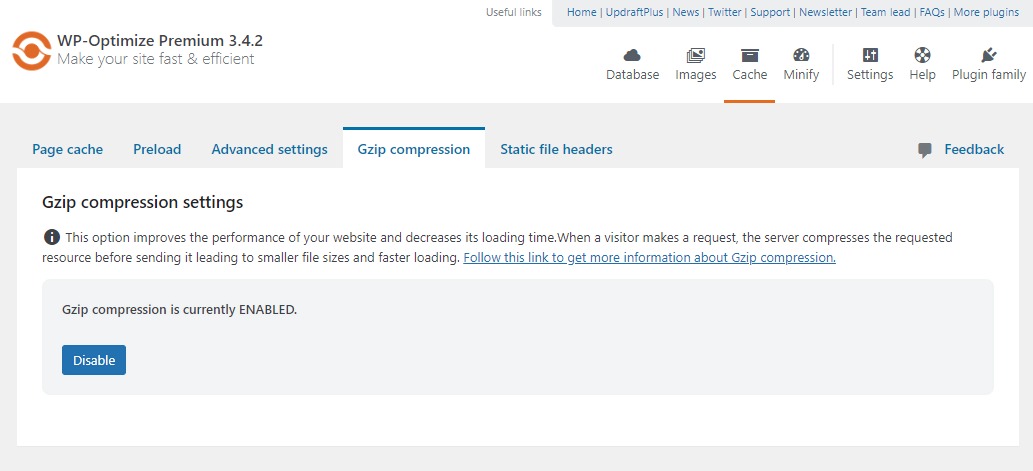
Gzip compression WP-Optimize supports GZIP compression in its free version. This compresses website content and speeds up your site. WP Fastest Cache supports Gzip compression in its free version as well.
CDN integration WP-Optimize integrates seamlessly with Cloudflare. No additional setup required. WP Fastest Cache supports Cloudflare, Bunny CDN and a few other popular options.
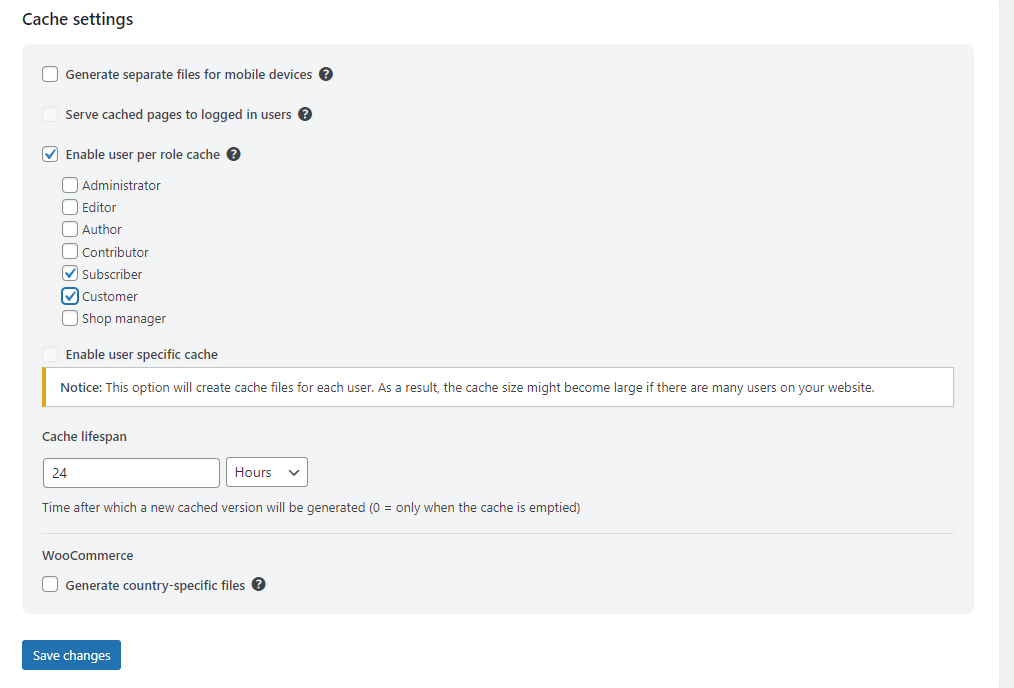
Mobile-specific caching With WP-Optimize, you can generate separate cache files for mobile devices WP Fastest Cache includes mobile-specific caching only in its premium version.
Multisite support Multisite is a premium feature in WP-Optimize, allowing you to optimize several sites from a single dashboard. The free version of WP Fastest Cache supports multisite
Premium support Premium WP-Optimize users get access to fast support that usually responds in 24 hours. Buying WP Fastest Cache premium gets you premium support, but there’s no guarantee how quickly support will respond.
So overall, what are the major differences between WP-Optimize and WP Fastest Cache? Both plugins are all-in-one caching and performance-enhancing plugins, but what’s the difference?

It’s clear that WP-Optimize is the more feature-rich of the two, especially in the free version. Things like database cleanup, minification and mobile cache are extremely limited or absent in the free version of WP Fastest Cache.

Between the premium versions of both plugins, there isn’t any glaring lack of major features, but the user interface for WP-Optimize is easier to use and better organized. The full suite of performance enhancements – caching, database optimization and minification – is there. But many features are a lot less configurable in WP Fastest Cache, like the lack of role-based cache or ability to customize database cleanup scheduling.

As for what WP Fastest Cache does better than WP-Optimize, it supports more CDNs while WP-Optimize supports only Cloudflare. And multisite support is included in the free version.

Otherwise, WP-Optimize definitely has more free features, so it’s likely to appeal to more users.

WP-Optimize vs WP Fastest Cache: Areas of difference

Both WP-Optimize and WP Fastest Cache do a good job at improving website performance, but the features they offer are very different. Each plugin has its own strengths and weaknesses. Let’s go over the key differences between the two and how their major features compare.

Ease of use and interface

One of the first things users look for in a plugin is ease of use and user-friendliness of the interface. Most WordPress users aren’t developers, and a complicated and confusing interface can be very hard to work with. How do these two plugins compare?

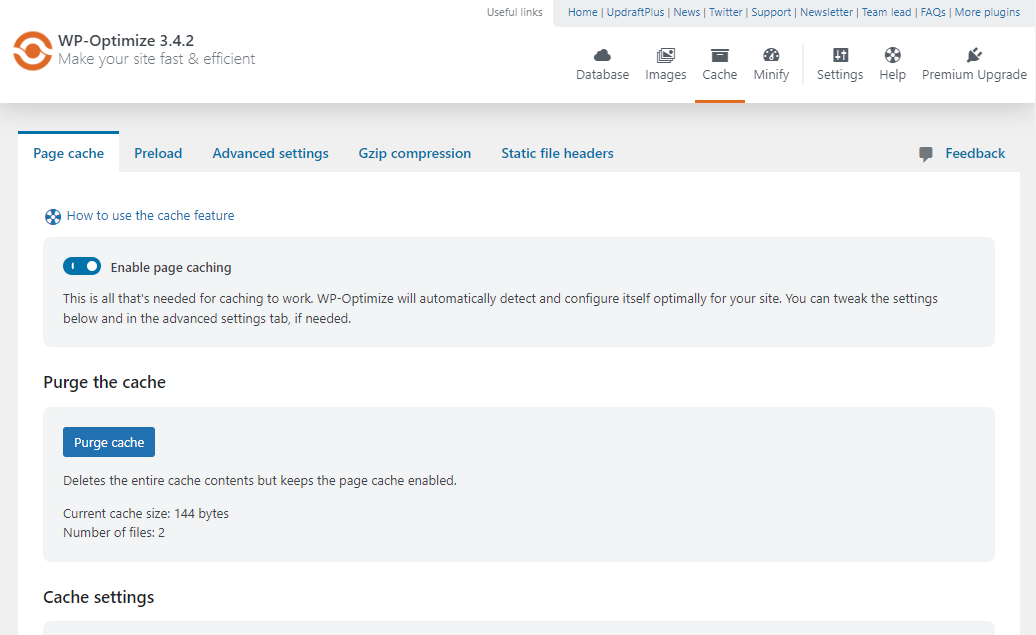
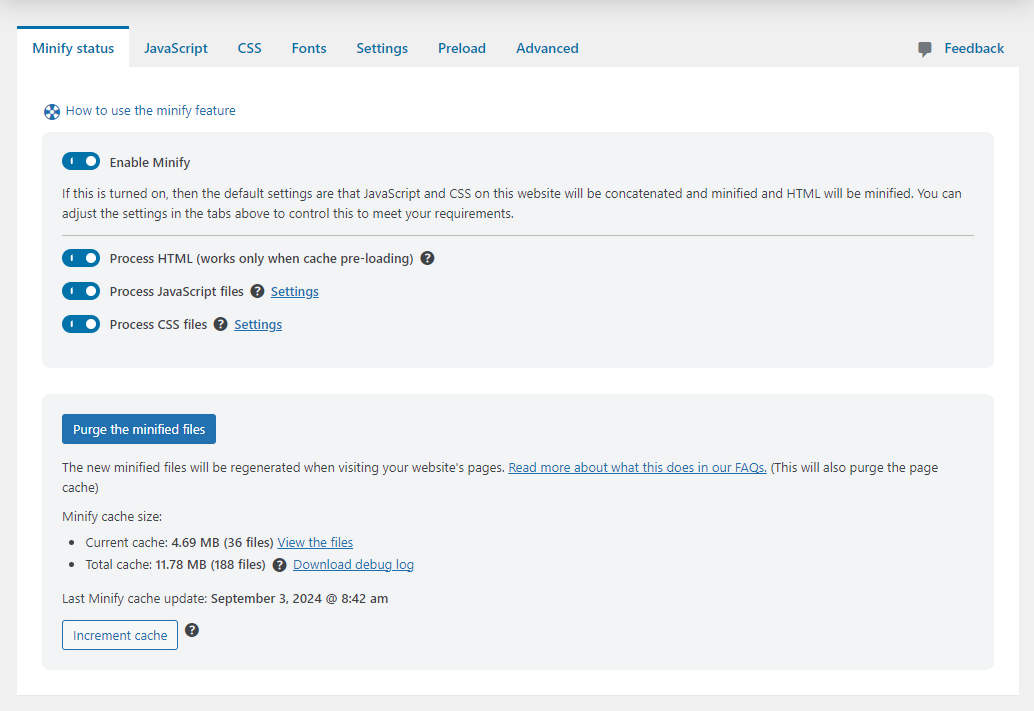
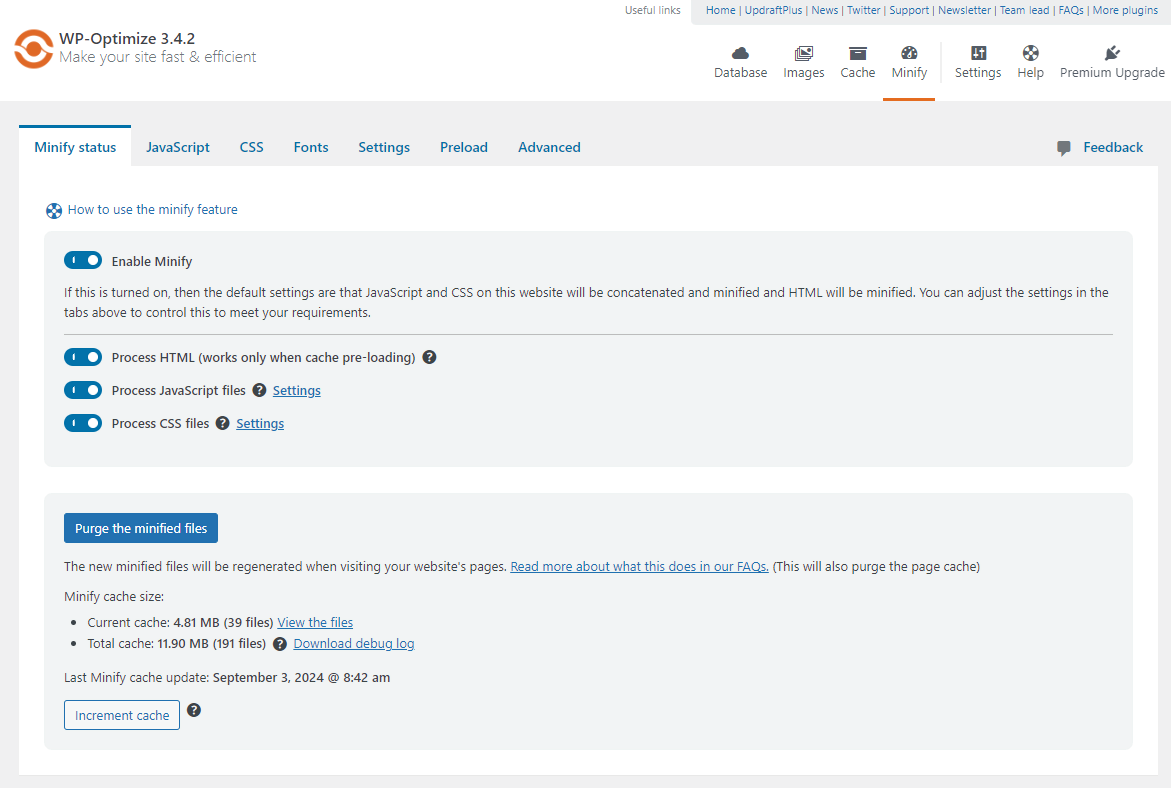
The WP-Optimize interface is designed to be clean, intuitive and easy to navigate. Everything you need is located on a single page; just use the tabs in the top right corner to move between performance settings.

enable-minify-minify-status

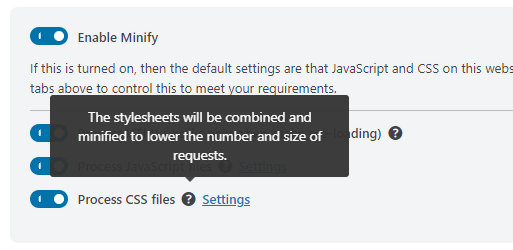
There are quite a few settings to familiarise yourself with,, but they are cleanly laid out and explained clearly with on-page tooltips.

stylesheet-will-be-combined-alert

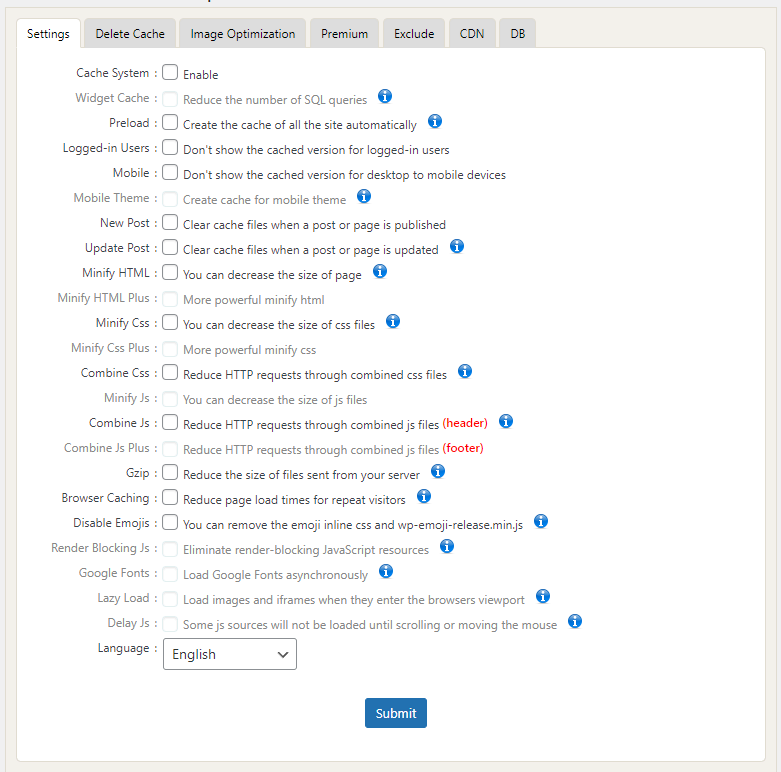
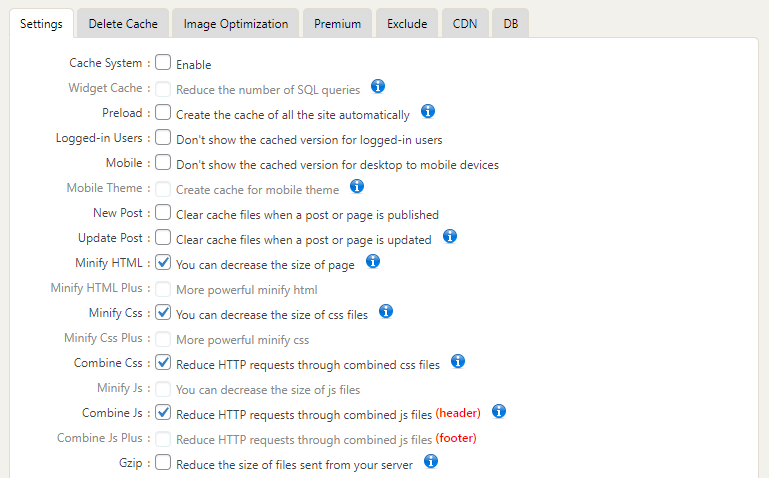
As for WP Fastest Cache, they also use a similar one-page style that’s easy to navigate with tabs. And since it’s a simpler plugin, most of the options fit onto a single page.

different-settings

The issue here is that the options here are not organized or broken up in any way. Finding what you’re looking for is a lot less intuitive, which can be overwhelming for users.

In the free version, premium settings and tabs aren’t hidden, just greyed out. This makes the interface all the more cluttered and potentially confusing. The tooltips also open up entire articles in another tab, which is more likely to overload users than short, on-page explanations.

Page caching

Page caching is a crucial feature for any performance optimization plugin, and both WP-Optimize and WP Fastest cache include it. But how do the two stack up?

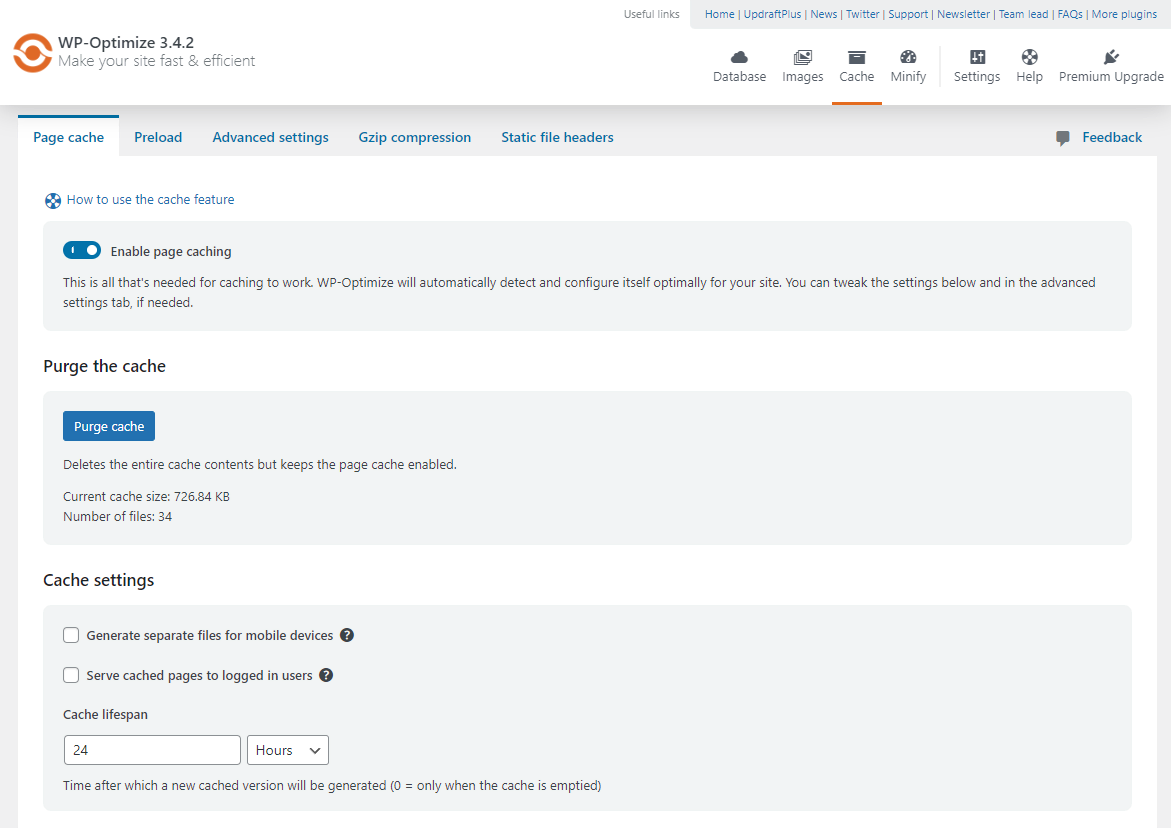
In WP-Optimize, turning on caching is as easy as clicking Enable page caching. The plugin will configure itself, so you don’t need to do anything special to get it working.

page-cache-settings

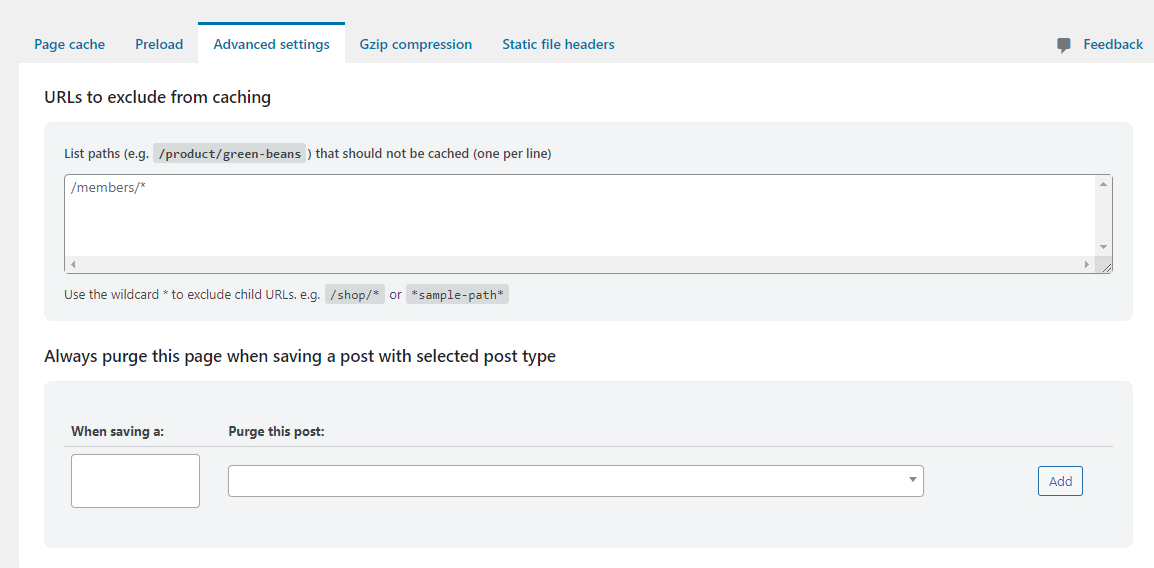
But if you do need to configure the cache or (in premium) set up special purging rules, there’s plenty of settings to do so under Advanced settings.

urls-to-exclude

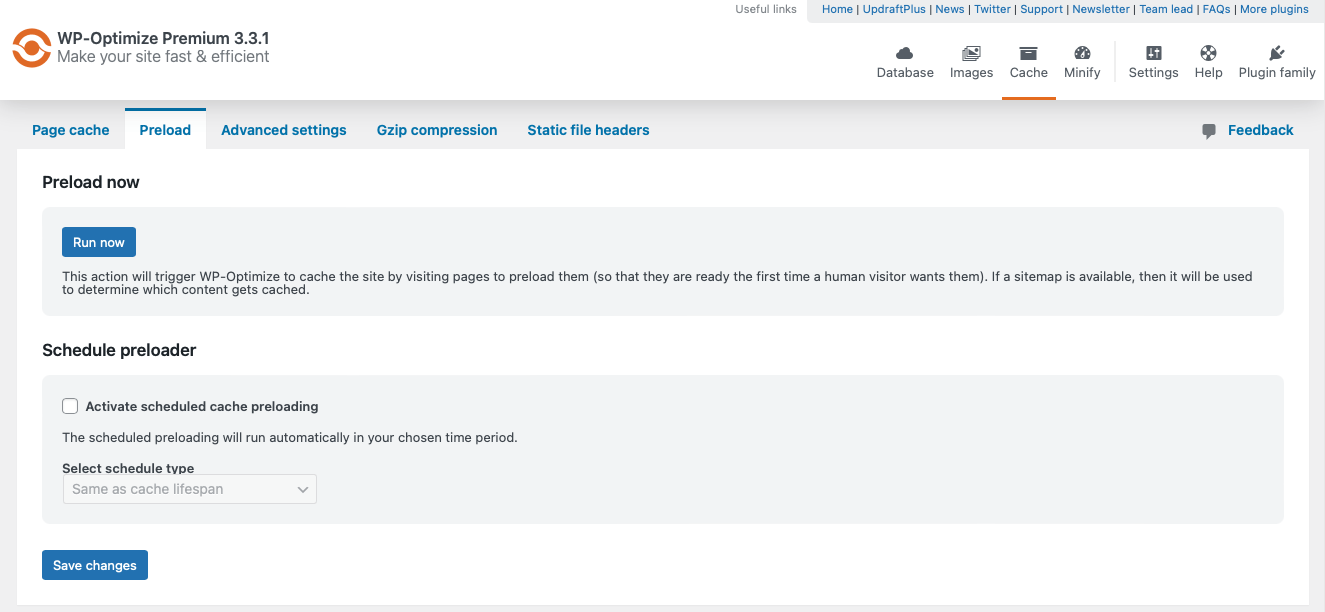
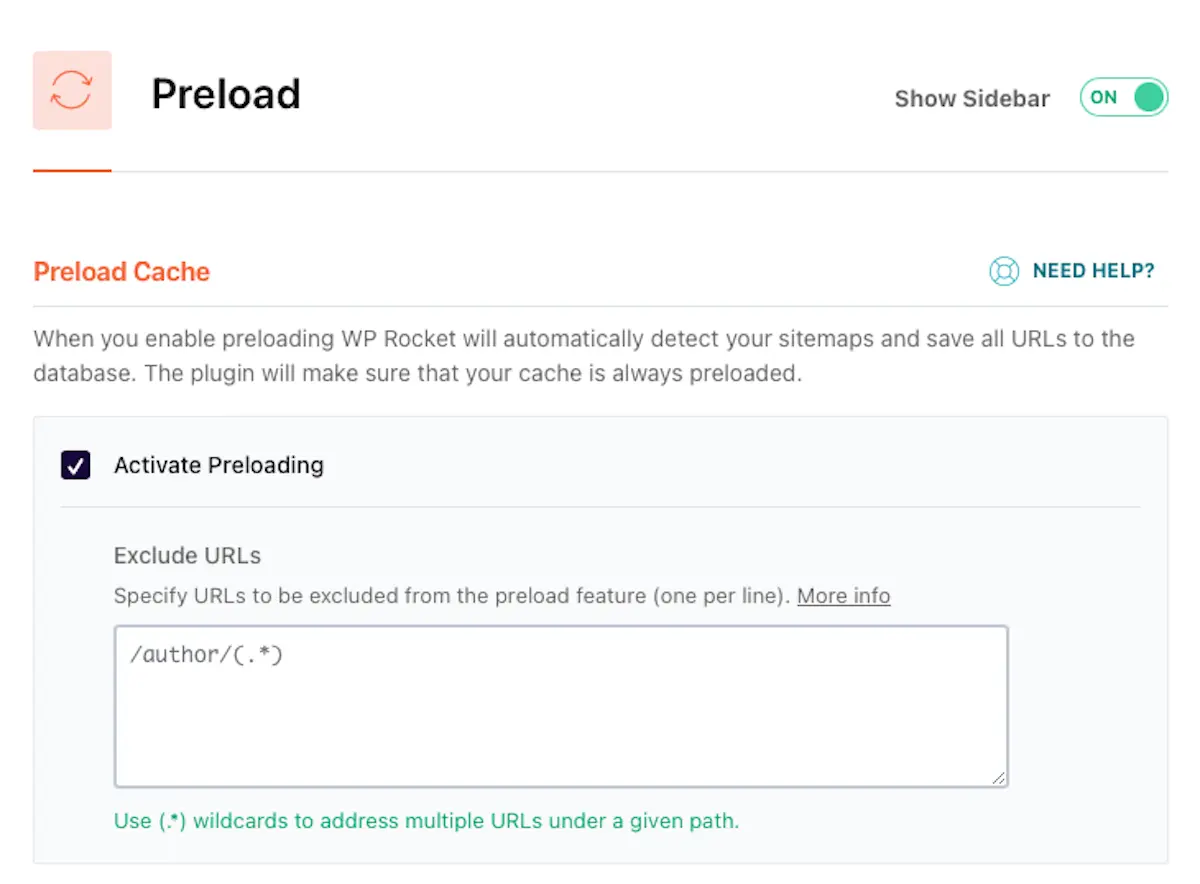
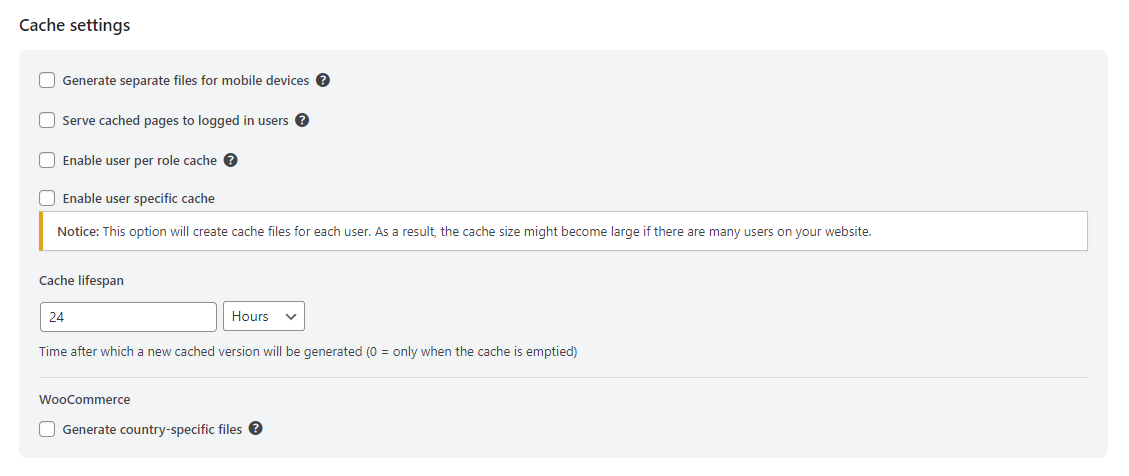
You can also find extra settings like the ability to create a separate mobile cache, scheduling preloading and setting up the cache lifespan. In the premium version of WP-Optimize, you can set a user and role-specific cache as well. Or even generate country-specific files for WooCommerce.

generate-country-specific-codes

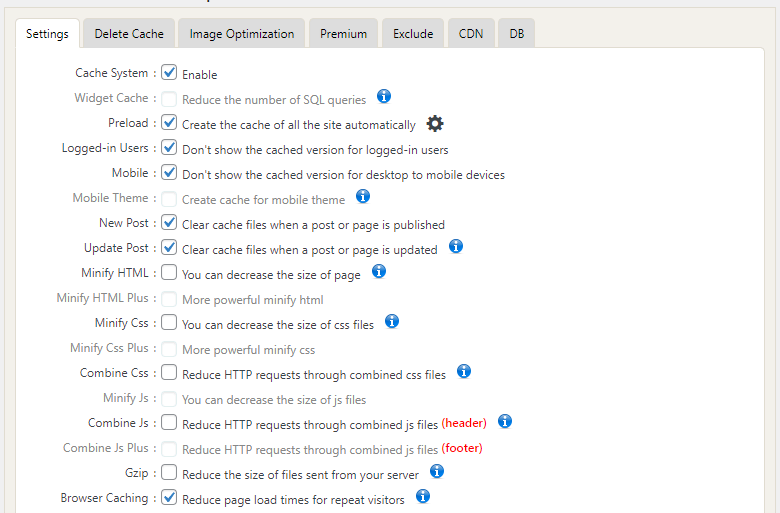
In WP Fastest Cache, it’s even simpler, though that’s not necessarily a good thing. Enabling the cache is also a one-click affair.

more-cache-settings

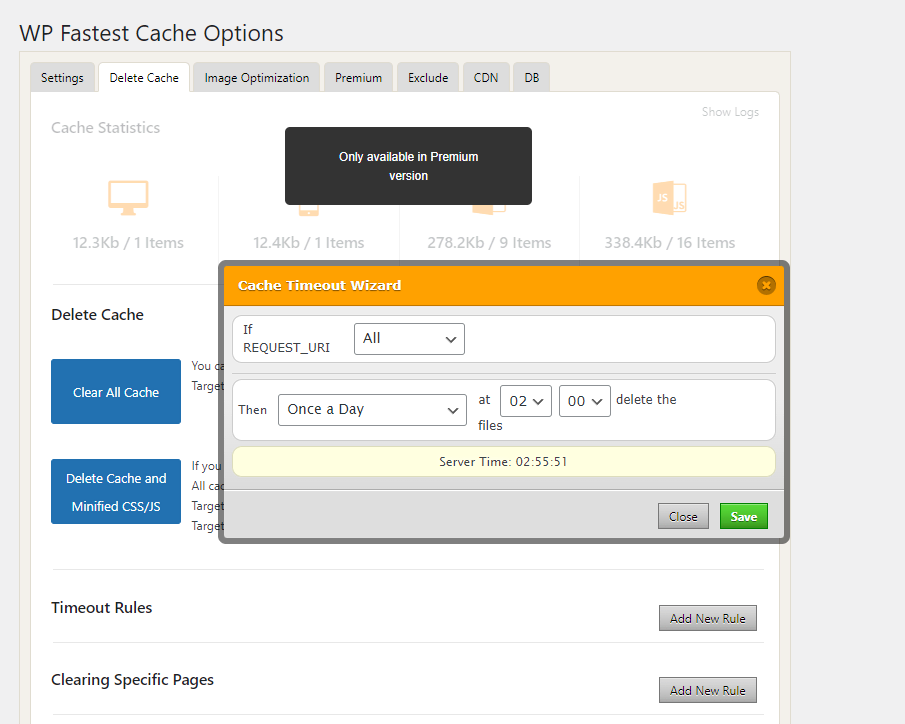
There are other cache rules in the Delete Cache or Exclude tabs too. Unlike WP-Optimize, where all cache settings are kept together, WP Fastest Cache tends to scatter its settings around different tabs which can make them harder to find.

cache-timeout-wizard

Most of these settings have a lot less configuration, or no configuration at all. They’re just a setting you turn on or off. While that makes it simpler, caching can be finicky and sometimes more control is better.

Database optimization

Over time, your database will inevitably fill with junk. Post revisions, drafts, spam comments and orphaned metadata can all unnecessarily slow down your website.

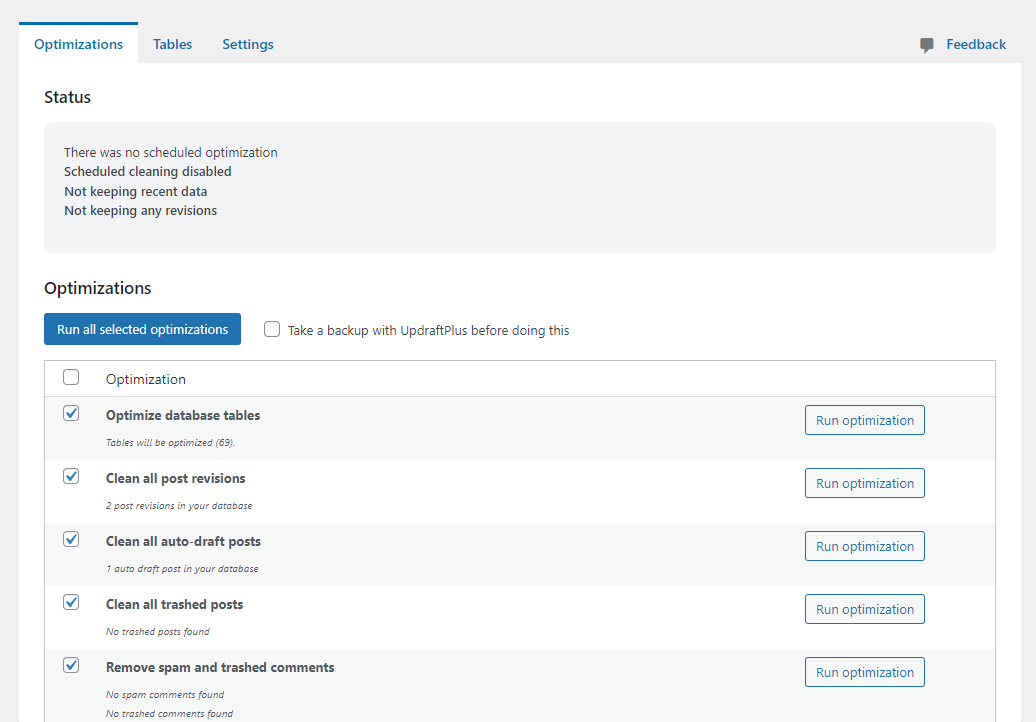
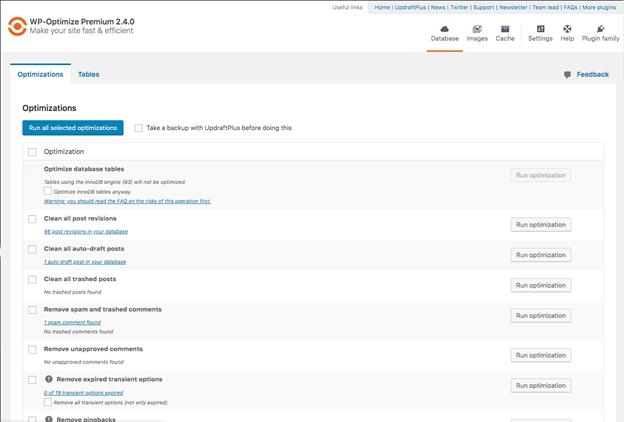
Database cleaning is a free feature in WP-Optimize. Besides a general tool to optimize all database tables, it can delete the following:

  • Post revisions
  • Auto-draft posts
  • Trashed posts
  • Spam and trashed comments
  • Unapproved comments
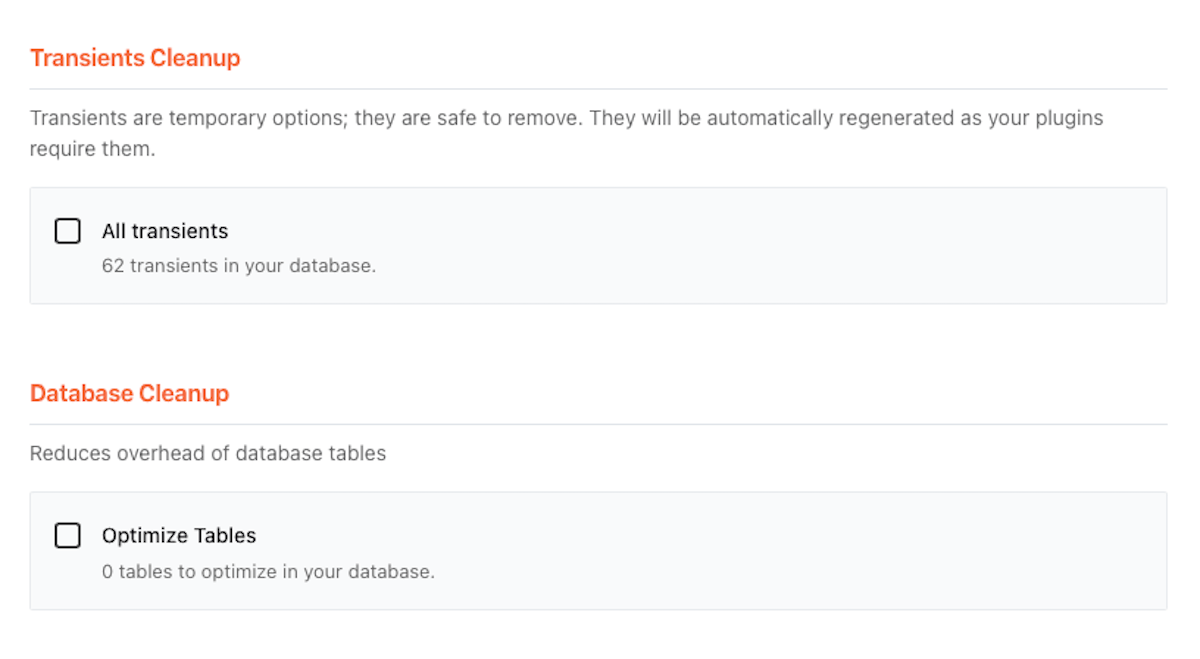
  • Expired transient options
  • Pingbacks
  • Trackbacks
  • Orphaned post metadata
  • Orphaned user metadata
  • Orphaned comment metadata
  • Orphaned relationship data

If you don’t want to delete some of this, it’s as easy as unticking the box and not including that optimization in the scheduler.

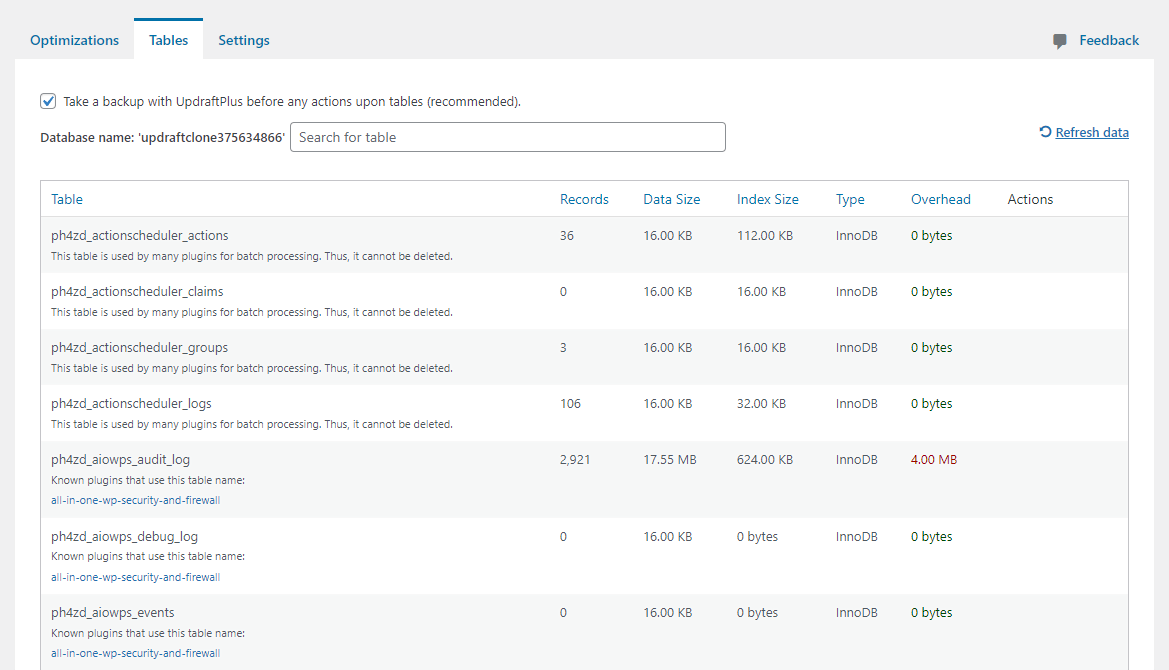
Additionally, you can take a closer look at your database tables and manually delete anything you don’t want, like orphaned plugin data.

table-view

The only difference between the free and premium versions of WP-Optimize here is that you get more control over scheduled database cleanups. There are also power tweaks you can turn on to speed up your database.

scheduled-clean-up-settings
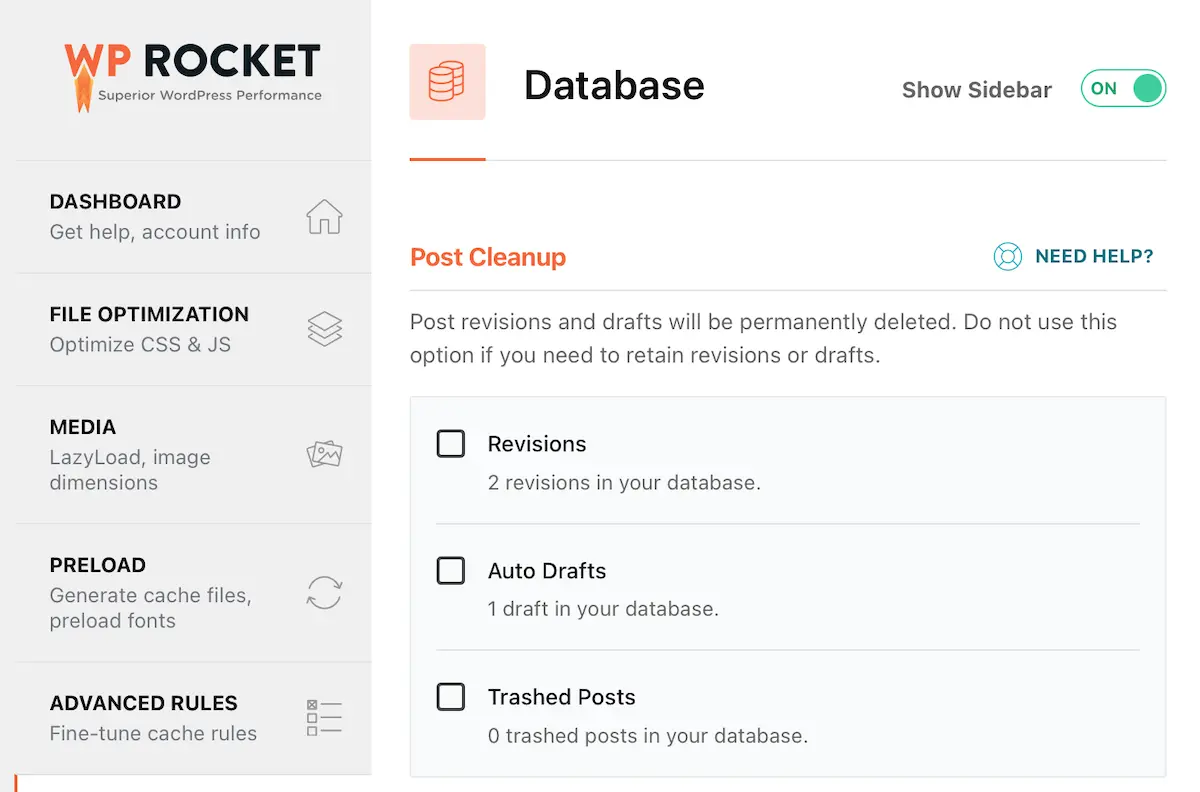
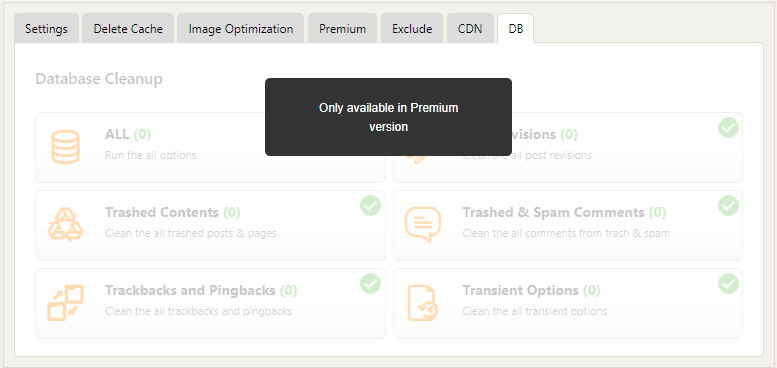
WP Fastest Cache also has a database cleanup feature, but it’s not available for free. Also, it only covers the following:

  • Post revisions
  • Trashed posts and pages
  • Trashed and spam comments
  • Trackbacks and pingbacks
  • Transient options

That’s less than WP-Optimize. It also has an auto cleanup feature, but it’s very limited. You can only clean up your database once a day or once a week at 5 AM. With WP-Optimize, on the other hand, you can schedule database cleanups to run at times that suit you.

d8-settings

It’s a lot less flexible than WP-Optimize, which offers the same feature for free.

Minification

Minifying HTML, CSS and Javascript is an essential part of performance optimization, and a feature available in both of these plugins. But the way they go about it is very different, so let’s take a closer look.

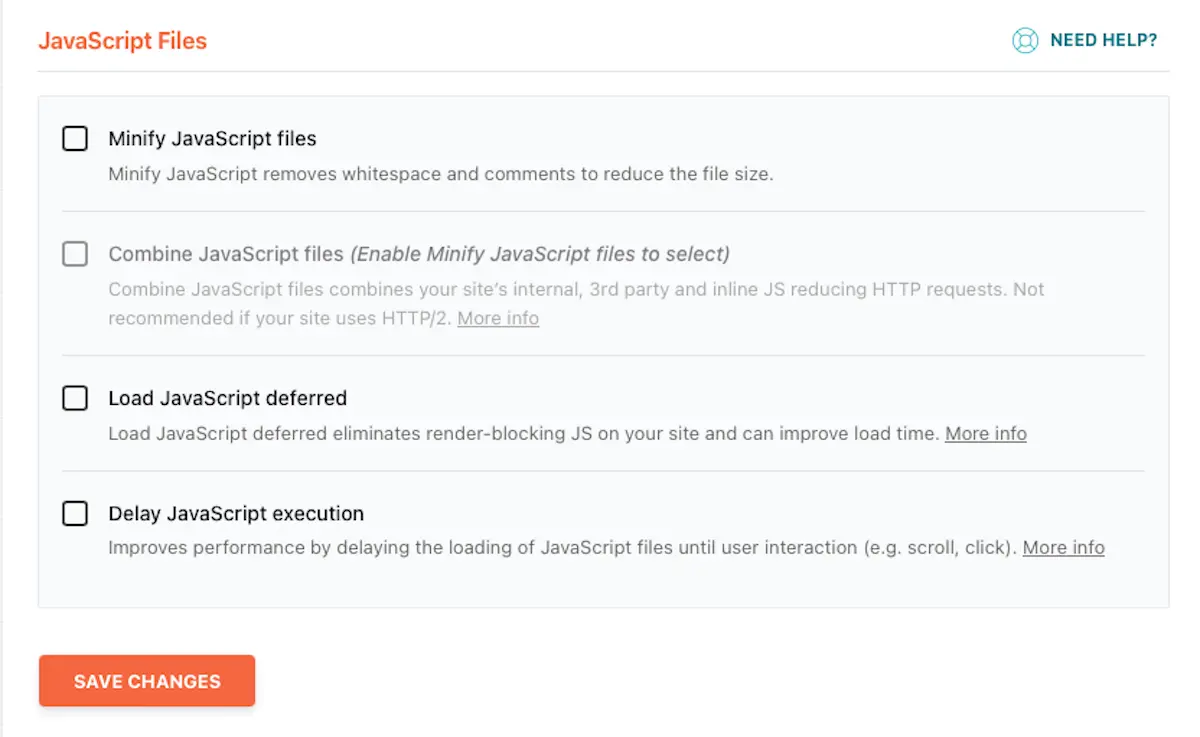
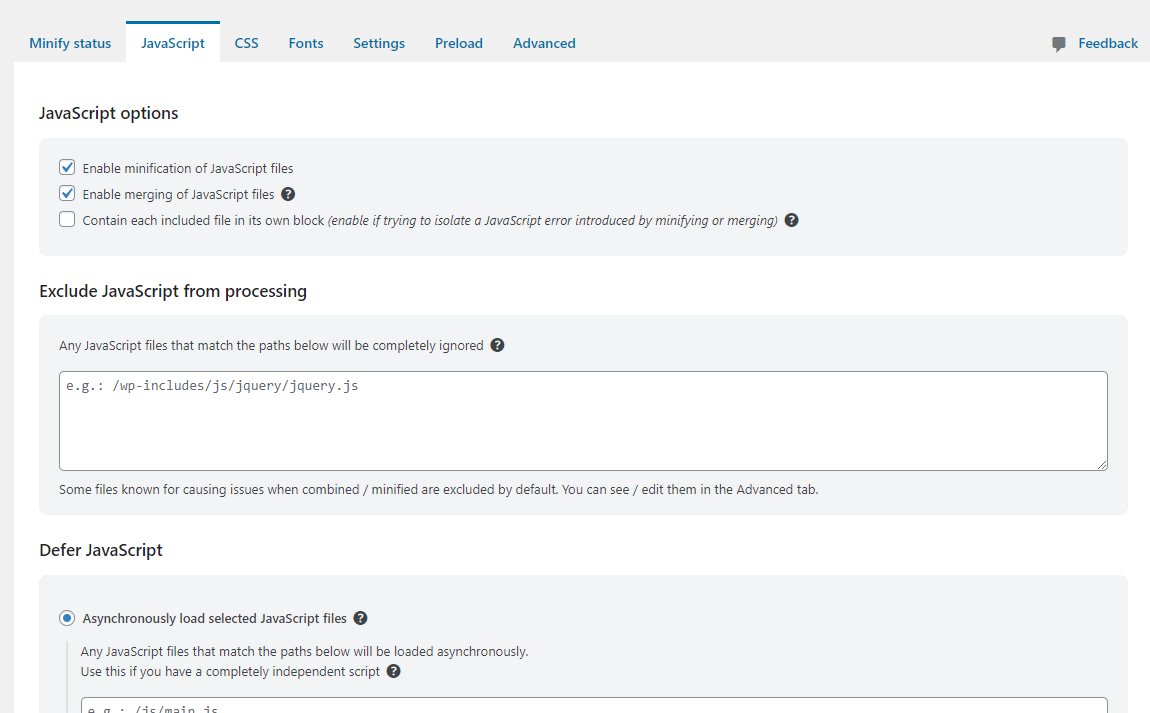
In WP-Optimize, you can enable minification by just clicking a few buttons. Like caching, minification can require extra fine-tuning, so you’ll find advanced settings for CSS and Javascript minification in their own tabs.

javascript-minification

The only premium setting here is the ability to preload key requests and assets to improve load speed. Everything else is accessible in the free version.

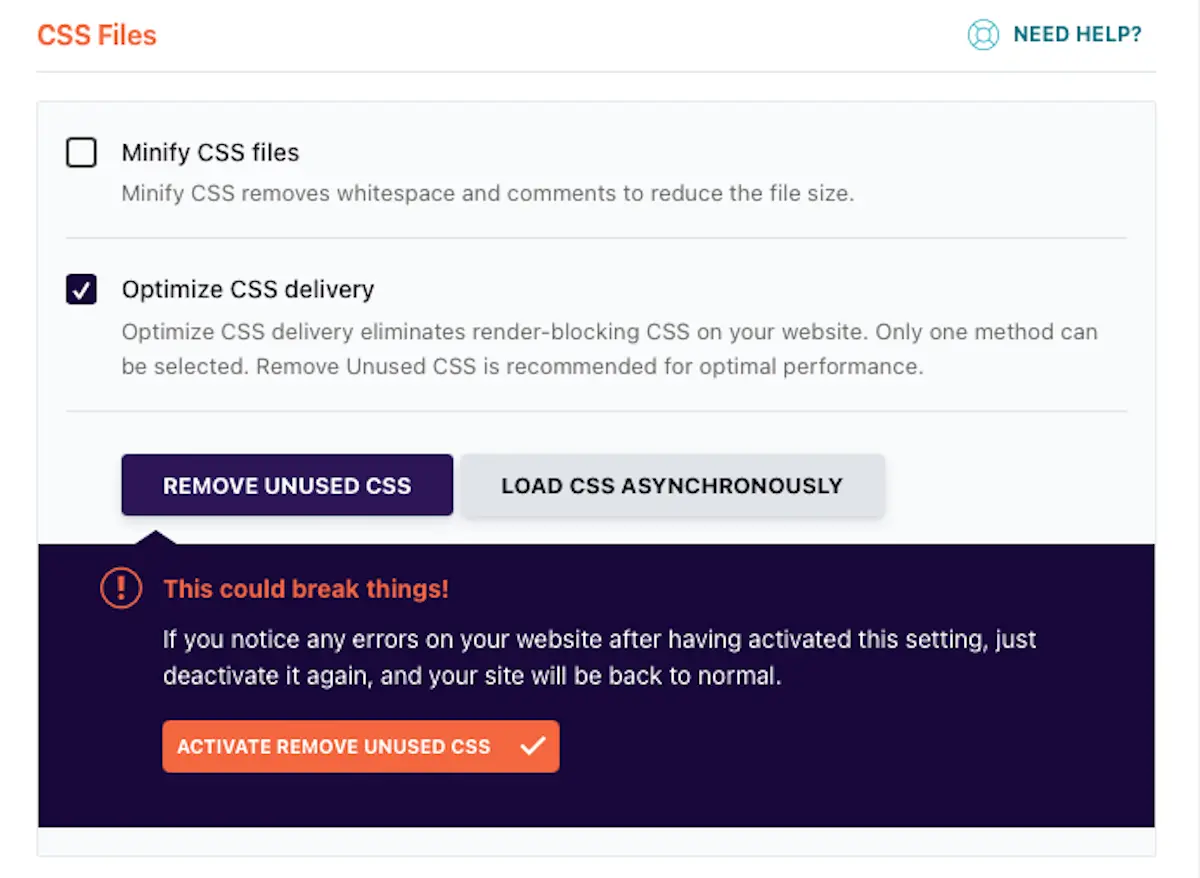
WP Fastest Cache takes a much different approach. You can minify HTML and CSS in the free version, but minifying Javascript is a premium-only feature.

more-settings-view

Also, the HTML and CSS minification does not work as well as it could in the free version. By purchasing premium, you unlock ‘Minify HTML/CSS Plus’ which is more powerful.

But this means that minifying with the free version of WP Fastest Cache is probably not as effective as minifying with WP-Optimize.

Image optimization

Optimizing images is easy to do and can give your website an instant performance boost. WP-Optimize and WP Fastest Cache both have their own ways of tackling large image files.

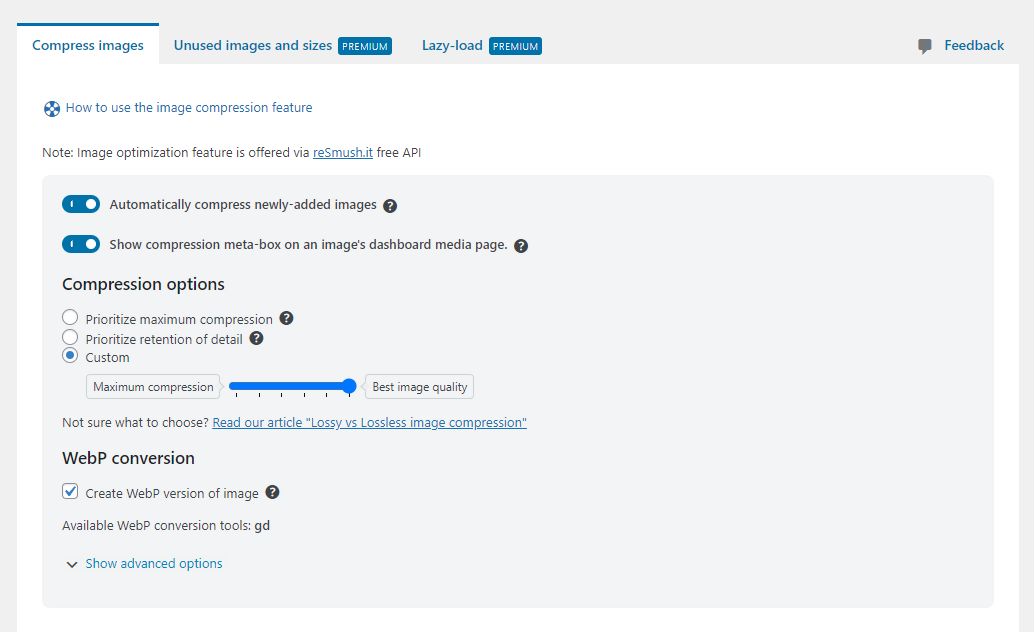
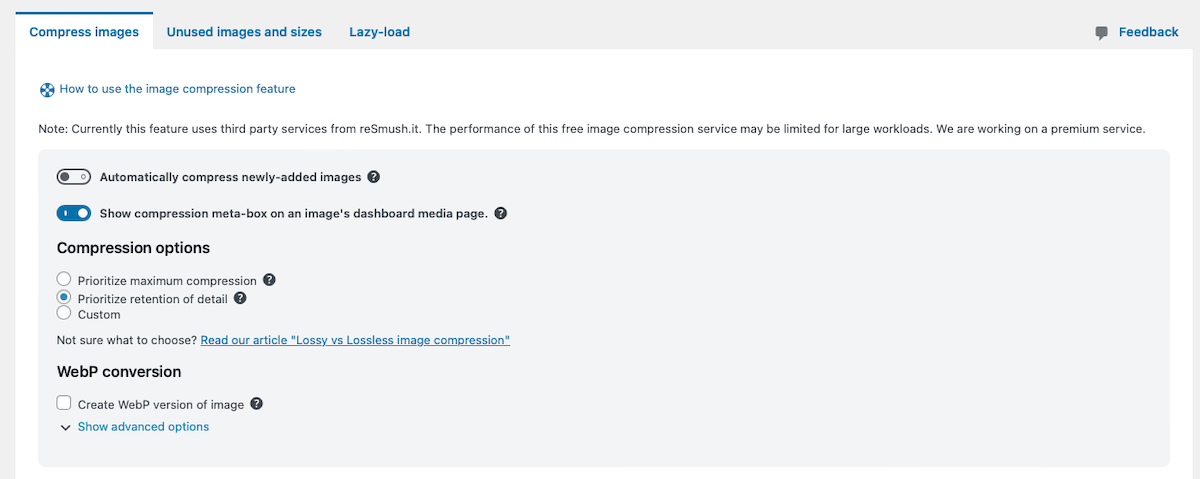
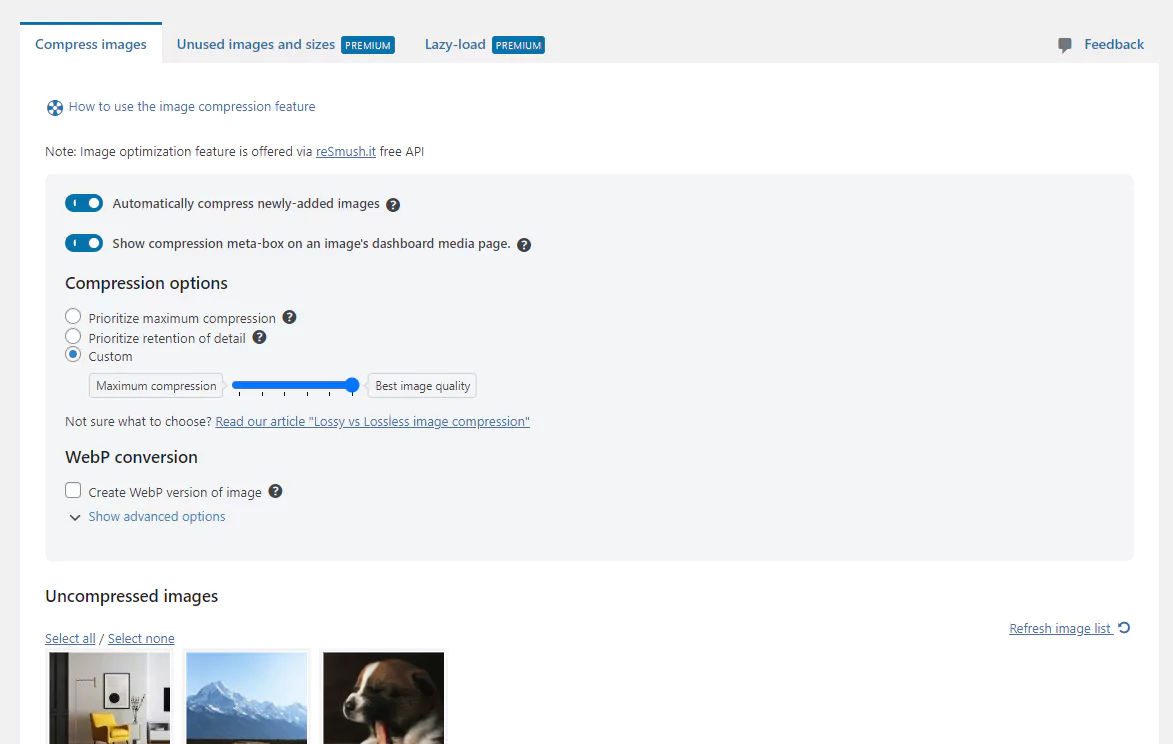
Within the free version of WP-Optimize, you can find the image compression feature. You can fully configure the level of lossy or lossless compression, optionally compress newly uploaded images or manually compress existing images on your site in bulk.

compress-images

Converting to WebP is another free setting. All this works through the reSmush.it API. Additionally, in the premium version, you can enable lazy loading and delete unused images taking up space on your site.

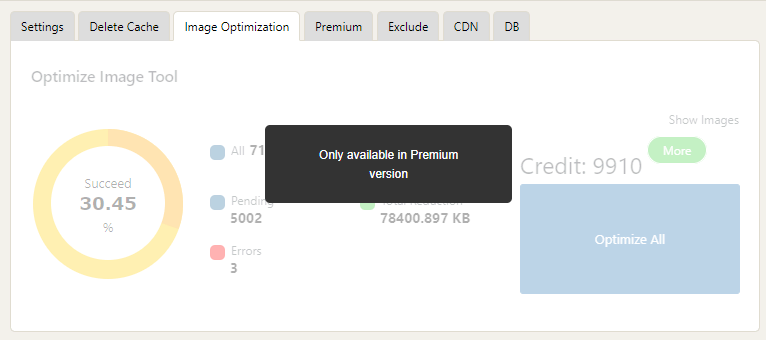
In WP Fastest Cache, image optimization is a premium-only feature. There’s not much customization or control over lossy and lossless settings at all; you just click a button to optimize the images. Even turning off WebP conversion requires adding code to wp-config.php.

Another issue is that you’re given a limited number of optimization credits which don’t replenish on their own. If you need more, you have to buy them. But since you get over 9000 credits to start with (one per image), this is unlikely to be a problem for most users.

Plugin documentation and support

Clear documentation and helpful support may not be strictly necessary, but they can definitely be helpful. Whether you prefer to read through documentation or to contact support and ask for help, either option should be there.

WP-Optimize provides thorough documentation that covers both basic and advanced features. The extensive FAQs are also full of solutions to common issues.

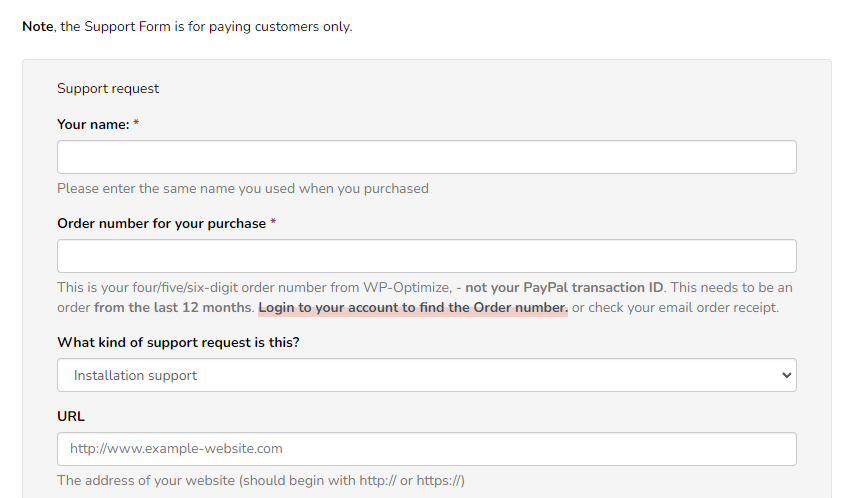
And if you’d rather contact support for help, you can either visit the WordPress plugin forums for prompt assistance or, for premium users, send in a ticket. Most messages get a reply within 24 hours.

support-form

As for WP Fastest Cache, free support is provided through its own plugin forums, or you can get premium support through its website. However, there’s no documentation available at all. There are some blog posts you can access through tooltips within the plugin. While it is a fairly simple plugin, if you do have a problem, it can be hard to find the solution.

Pricing and plans

Both WP-Optimize and WP Fastest Cache have free versions with solid features, but they also have premium plans that introduce new features. Which one fits your budget more, or has more value for its cost?

WP-Optimize’s free version includes essential features like page caching, database cleanup, image compression, and minification. By upgrading to premium, you unlock more advanced features: image lazy loading, preloading key requests, user role cache and more.

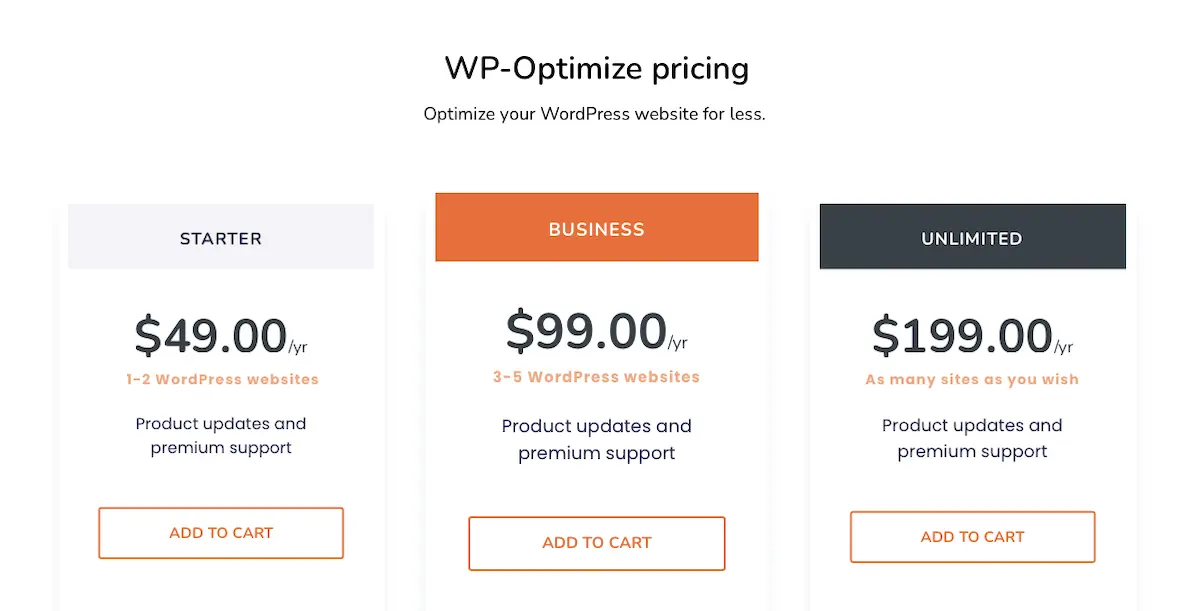
There are three premium plans: The $49/year Starter plan, $99/year Business plan and $199/year Unlimited plan.

All of these plans unlock the premium features. A higher-tier plan gives you access to WP-Optimize on more websites, with the Unlimited plan working with as many websites as you want.

WP Fastest Cache uses a different type of pricing. Instead of a yearly fee, it only costs a one-time fee. The single-licence plan costs $49, with the most expensive 10-licence plan costing $300.

While this makes WP Fastest Cache the cheaper option for single licence plans, it does come with fewer features and less depth to those features.

Another issue is if you need a lot of licences; with WP-Optimize, you can get unlimited licences for only $199/year, but you only get 10 licences for $300 with WP Fastest Cache.

Conclusion and recommendations

Both WP-Optimize and WP Fastest Cache work well as all-in-one performance-enhancing plugins, filling slightly different niches. WP Fastest Cache is simpler and its lifetime pricing may be more appealing, but it lacks many of the advanced features WP-Optimize provides.

As the more comprehensive solution, WP-Optimize offers database optimization, image compression, and advanced caching tools all in its free version, while WP Fastest Cache lacks many of these features in its free version.

If you’re not sure which one will work better with your site, you can always download and try them both. Download WP-Optimize free or buy the premium version to see for yourself.

FAQs

Does WP Fastest Cache have database cleanup?

WP Fastest Cache only provides database optimization in its premium version. WP-Optimize offers database cleanup for free, which helps you clean up post revisions, spam comments, and other unnecessary data.

Can you optimize images with WP Fastest Cache?

Image optimization is only available in the premium version of WP Fastest Cache, and it uses a limited credit system that doesn’t refill. WP-Optimize offers image compression and WebP conversion within its free version.

How does minification work in WP Fastest Cache?

In WP Fastest Cache’s free version, you can only minify CSS and HTML. Javascript minification is limited to the paid version. The paid version also gives you ‘Minify HTML/CSS Plus’ which compresses files even more.

Is there mobile caching in WP Fastest Cache?

Mobile-specific device caching is only in WP Fastest Cache Premium, while WP-Optimize provides this feature for free.

8 ways to boost your WordPress website conversion rates

8 ways to boost your WordPress website conversion rates

Your site might have lots of traffic, but if your website conversion rates are down, your bottom line will take a huge hit. It’s absolutely crucial to optimize your web design and site functionality to increase your conversion rates. All your efforts to drive traffic, like SEO or digital marketing will be futile, if that traffic will bounce away uninterested.

Website conversions are a direct indicator of sales volume. A conversion can be a click on a ‘Call to Action’ button, adding a product to a shopping cart, filling a lead generation form, or simply providing an email address to sign up for a newsletter. The ultimate conversion will always be buying a product, but you can have multiple conversions along the marketing funnel.

What is your website conversion rate? 

Conversion rate is the percentage of your web visitors that complete your desired goal. It’s a direct function of the usability and branding of your website. 

There are of course a host of tactics you can employ to improve conversion rate and SEO ranking – such as continuously improving and updating your site with new content, products, deals, videos, blogs etc. A stagnant website will miss out on many opportunities to increase revenue and fall down the SEO ranking order.

CRO – or conversion rate optimization, uses the traffic you already have to drive conversions, instead of increasing traffic to your website. This is the best way to get the most bang for your marketing buck and once you have a higher-converting website, you can start investing in driving traffic again.

Image Source

Here are eight practical and proven ways to improve website conversion rates:

1.   Use pictures

Image optimization can help instantly communicate your value proposition better than most copy. Rarely does anyone have time to read your product descriptions in full, but if you’re lucky enough to find a picture that tells all, you can change their mind and convince a potential customer to buy your product from a host of rivals. 

If you have an online video conferencing service for example, you can show a potential customer how they would look during a web meeting. Such an image will help engage the visitor further and allow you to guide them down the sales funnel with further engagement.

Here are some tips for choosing images:

  1. Choose images of people using your products and not just an image of your products.
  2. Don’t use stock photos, use Google advanced image search. Or better still create your own photos.
  3. Edit your photos to get the best optimization and loading speed
  4. Test images for landing pages
  5. Choose responsive images that attract attention

2.   Include reviews, links and ratings

Customer testimonials, star ratings and reviews all play an important role in influencing buying decisions. This is due to the phenomenon of social proof, whereby consumers believe more in a product if others are also buying, using and enjoying it. 

Leveraging social proof can be one of your biggest assets to increase trust in your brand and ultimately increase ecommerce traffic and sales.

Ensuring your brand story has social proof to support it is essential to building credibility. Incorporating social proof into your web design is a fail-safe marketing strategy. 

Add customer testimonials next to your product descriptions to show potential customers that your product has been used and highly rated by others. Customers tend to be sceptical by nature, adding the element of social proof increases their confidence and can help convince them that your brand is worth investing in. Social proof on your landing pages can also be a big source of conversions and can enhance engagement on your website.

3.   Make conversions smaller commitments

It’s a busy world and if you have a higher bounce rate, it could be because the actions needed to convert are too time consuming. 

Understand that time is money and people have short attention spans. People are commitment averse; they would rather put 10 items in their shopping cart than immediately buy one.

Ask your customers for smaller commitments, especially if you have a service company or sell expensive products that require special consideration. Changing your CTA buttons to softer alternatives to immediate purchases can work wonders. 

For instance, changing a “Buy now” button to “Book a free consultation” is much friendlier for the commitment-phobic because it reassures the user that a conversation is the next step, not an ultimate purchase.

A recent test found that simply changing a main call to action to “Contact seller” from “Buy now” increased conversion rates by 73%.

Image source

4.   Optimize UX design and copy

UX design or the user experience of your web design is perhaps the biggest decider of where a user will land. Make sure your website can be navigated smoothly and seamlessly. A great UX design is essential to increase website conversion rates.

The copy of your website goes hand in hand with your UX. Use active language and provide clickable options so users can go where they want without too much work. Expose primary navigation items at all times, so people can move through the website at will.

5.   Reduce fields in contact forms

One of the primary ways to gain leads is to have people sign up via contact forms. Filling out these forms though can be a hassle. If your form has too many fields, people might skip signing up altogether. Remove as many barriers as possible.

Let a potential customer know the benefits of filling out a form. Set out expectations so you don’t fall short. Make sure your contact forms are conversational and friendly. Forms with too many fields are intimidating and people are often wary about giving out too much personal information.

Stick to fields that are necessary for conversion and do away with all the fluff that makes form filling a hassle. You should hopefully then find that your contact form submissions will increase.

6.   Optimize customer support

Customers are more likely to buy when their concerns are addressed during their initial “buying” period, which is usually under a minute. You should have a support team available to handle queries via live chat and other channels, and have an automated system like automatic call distribution that can send the queries and questions to the relevant departments in the case of any phone calls.

Interactive voice response (IVR) is another tech example to consider to support any phone-based customer support. IVR is a form of speech recognition technology that allows customers to interact with an organization’s contact center with the minimum of fuss.

Image Source

7.   Optimize for mobile

Given the amount of traffic that is now sourced from mobile phones, it is important that you have a dedicated mobile format for your website. Failure to do this could result in a huge chunk of your potential customers being lost. 

It is important that your mobile website is responsive and optimized for mobile use, which means button sizes and font sizes should be designed to work on mobile devices. Remember to be creative with mobile marketing – if done right and integrated with social media apps, it can help improve your conversion rate.

Make sure to also optimize any newsletters, e-mails and anything that goes through an SMTP for mobile, as they can result in new leads if formatted correctly. 

8.   Strengthen your ‘call to action’ point

The following guidelines can help create call to actions (CTAs) that will increase website conversion rates, as the right CTA can be all that’s needed to set you apart:           

  • Have a clear and bright CTA on the landing page. 
  • Keep your CTA simple and use active language to communicate value and urgency.
  • Personalize your CTAs – Personalized CTAs perform 202% better than basic CTAs.
  • Don’t use multiple CTAs on each page.
  • Attract attention to CTAs by using pop ups. But remember not to be intrusive or disruptive to the customer experience.

Test before you launch

The eight examples listed above can all help boost your site performance, but all updates and changes to your site need to be tested after implementation. 

Perform A/B testing on every change you make. Web design requires you to be on your toes and make changes every so often to optimize the content, while resolving any ‘pain points’ customers may be experiencing.

When embarking on your continuous conversion rate optimization (CRO) journey, using process discovery could also be invaluable. It can help you discover processes you may be able to automate in the future to improve the user experience of your website to reduce bounce rates, gain more leads and enhance conversion rates.

Once you have reached the point where your website resonates with your target audience, you can use a SaaS retargeting strategy to directly tackle those that do not convert. This method targets that part of your traffic that bounced and shows them ads to help drive them back to your website and hopefully convert. 

If you follow all the advice above, test as you go and investigate how tech can assist you along the way, your conversion rates should improve accordingly. 

Patty Yan

Patty is the EMEA Product Marketing Manager for RingCentral Office

The post 8 ways to boost your WordPress website conversion rates appeared first on UpdraftPlus. UpdraftPlus – Backup, restore and migration plugin for WordPress.

Speed up your WordPress site using image optimization

Speed up your WordPress site using image optimization

‘When evaluating the speed and performance of your website, there are over 200 factors that search engines like Google use to rank content and web pages. Some of these factors are known, such as site update frequency, while the weight of other factors – such as meta-tag spamming, are not known to the extent they impact the ranking score and how they affect a site.

Possibly the most important factor when deciding your site’s Google ranking is its loading speed and how long the site takes to completely load on both mobile and desktop.

An important part of the loading speed process, your site’s overall SEO score and speed ranking is image size and image optimization. In this blog, we will be looking at why this is important and why you should always have optimized images on your site.

Why is image optimization important?

Since Google considers site loading speed to be one of the main ranking factors when evaluating a site’s SEO score, Google focuses on the overall user experience as a metric for website quality. The speed of a site not only has an impact on SEO score, but has also shown to have a large role in the bounce rate of users, as they typically tend to leave a site if it takes more than 3 seconds to load.

Slow site speed can be responsible for abandoned carts, drops in conversion rates, and other problems that might cause the user experience to be negatively rated. If an e-commerce site is making $100,000 per day, a 1-second page delay could potentially cost you $2.5 million in lost sales every year. A large portion of a website’s weight and loading speed factors can be attributed to the size of your image. Compressing your images will reduce the time it takes to load them in a user’s browser, improving the overall loading speed of the website.

It should also be noted that a high-speed internet connection is not going to solve the problem of a slow-loading website, as the loading speed is largely dictated by the host that is hosting your files, and can only upload them at a certain bandwidth.

How can you check your site speed?

It is possible to check your site speed using simple online tools. Some of the most commonly used web tools are listed below;

Google Insights

This is a developer’s tool that was introduced by Google for the single purpose of identifying site speed on a user’s desktop or mobile. This site should typically be your first port of call when evaluating site speed, as it belongs to the same organization that is responsible for ranking your website. As such, this adds a further level of legitimacy and behind-the-scenes knowledge when evaluating your site speed.

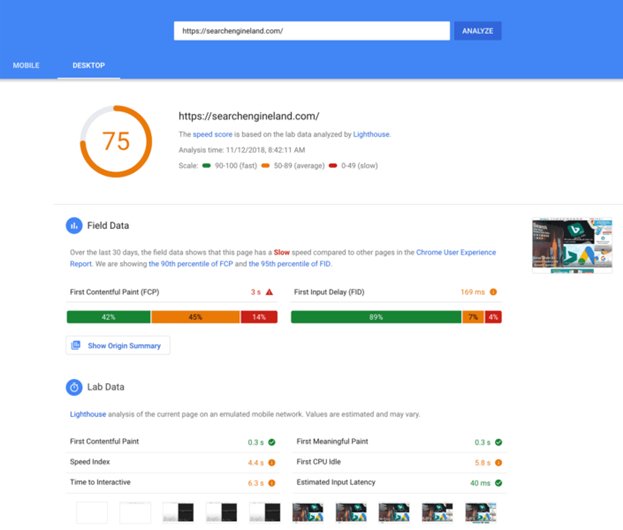
Insights not only measures the speed for both desktop and mobile but also provides a breakdown of all the reasons why and where any issue to the site speed lies. Google Insights also delves deep into the images and checks for the potential reduction in file size. This platform also allocates a score to your website, allowing you to gauge any short-term improvements and errors that you may have made, which you might not have realized otherwise. 

GT Metrix

GT Metrix is broadly similar to Google Insights, in that It more or less provides the same information and allocates a ranking score for your website. GT Metrix not only identifies any problems with your site but also provides potential solutions to any detected speed issues that may be slowing you down. If you are looking for something outside the Google ecosystem, this is a site that you should consider getting familiar with. 

If you have checked your site speed and image size has been flagged up as an issue, where do you go from there?

WP-Optimize – the WordPress plugin that makes image optimization simple

WP-Optimize is one of the leading WordPress optimization plugins that is trusted by over a million users all over the world, with a 4.8 out of 5 ranking on WP.org. Wp-Optimize focuses on the 3 main components when optimizing your site:

  1. Cleaning your database.
  2. Compressing your Images.
  3. Website caching.

While there are several overall different methods WP-Optimize can help with your site SEO, we will be focusing on the image compression aspect of the plugin for this blog. As mentioned above, image compression has long been an issue when it comes to site speed and just making these changes can have a big impact on loading times..

WP-Optimize uses a cutting-edge ‘lossy technique’ to compress large image files ( high load times) to smaller compressed versions ( low load times). All of the compressed images are then directly saved to the site’s image library, where they are accessible and reversible to their original size (should you wish to change them back). 

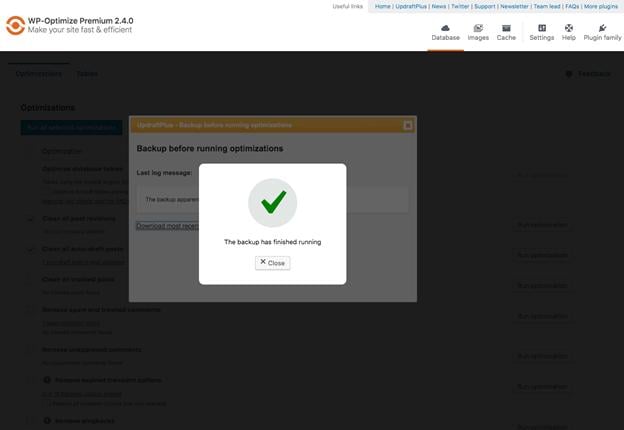
With WP-Optimize, you can compress different image file formats including; JPG, PNG, GIF, BMP and TIFF. When deciding which images you should compress, it is recommended that Images up to the size of 5 MB should be optimized for faster loading speeds. You should also always remember to take a backup of your site using UpdraftPlus before compressing any images or making any kind of change to your site, as potential issues may arise.

Additional features of WP-Optimize image optimization include:

Bulk compression

Allows you to select and compress all your images together. This can potentially save you a lot of time, as some sites can have hundreds, if not thousands of images that need compressing.

Intelligent, multi-pass lossy compression algorithm

The algorithm is created in such a way that it gives users twice the compression with a lot less loss of image quality.

Restore to the original image

While ‘Ctrl+Z’ can come in very handy in lots of online applications, it isn’t something that is usually found with an image optimization plugin. With WP-Optimize, you can revert back to the original images at any time. 
Auto compress 

Auto compress allows for all of your future images that will be uploaded to your website to be compressed automatically. This means you will not have to manually compress your images every time you upload a new one. Just select your compression settings and WP-Optimize will compress all of your images in real-time as they are being uploaded onto the website.

Keep your EXIF data

If your website is related to high-end photography (for example, a wedding photography site), the photographic data of your images can be incredibly important. With most image compression plugins, this data would be lost post-compression. But with WP-Optimize, you can select to keep the original photographic EXIF data, even if you decide to compress a 2GB image to 500k. 

Conclusion

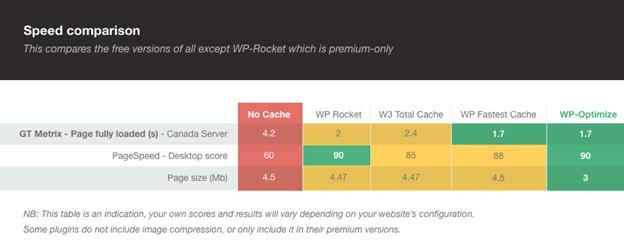
WP-Optimize is a great option that includes many different optimization factors in one convenient plugin. As an overall WordPress optimization plugin, WP-Optimize is as good as, if not better, than some of the ‘top’ paid plugins. The following chart shows how WP-Optimize compares to leading SEO plugins like WP-Rocket, W3, and WP Fastest Cache.

If you are looking to improve the loading speed of your site, compressing your images is a great way to start. Download WP-Optimize today and see the difference a good optimization plugin can make to your WordPress site.

The post Speed up your WordPress site using image optimization appeared first on UpdraftPlus. UpdraftPlus – Backup, restore and migration plugin for WordPress.

WordPress Caching guide: How does it improve your site speed? 

In this blog, we will discuss WordPress caching; what it does – and how it improves the performance and speed of your website. 

What is Caching? 

To understand WordPress caching, you first have to understand the concept of caching. Caching refers to the process of storing data in temporary folders where they are easily accessible. It’s primary aim is to reduce processing time and make information available as quickly as possible. 

This is especially important in WordPress websites. WordPress websites are dynamic by default, which means that each time a user visits your site, WordPress goes through a series of steps to generate information from your database to show to the visitor. 

The benefit of this process is that the user gets a somewhat customized experience, since the pages are generated specifically for them. This benefit has the drawbacks that occur as a result of the long processing time, which can make the website slower.

When it comes to caching specifically in WordPress, it works by following the process of temporarily storing the dynamically generated files of frequently visited pages on your website as static files for easy recollection and use. Caching reduces the demand on your web server to continuously generate dynamic content. This means that when a user visits a page, the page shown to the user is stored exactly how it appeared the last time they visited, so the next time that page is requested, there’s no need for WordPress to generate a new page. It just presents the previously generated page, at a rate that is 3-5 times faster.

There are two types of content available on web pages:

  • Static files: As the name implies, static files refer to the types of content that do not change. These types of files include images, javascript files, css stylesheets, and HTML pages. Static content remains the same regardless of the user and is created long before they are needed.
  • Dynamic files: Dynamic content is created at the point of request, specifically for the user. This type of content is created based on the user’s location, device and time of request.

WordPress caching is the process of storing these dynamic files as static files, thereby increasing the speed and performance of your website. 

There are two basic types of caching – Client-side and server-side. 

Client-side Caching 

Client-side caching occurs when the temporary caching files are stored on the end user’s device. Modern browsers have the benefit of having smart coding that aims to reduce redundancies by saving static files for future use. 

As a result, when users open a web-page, the browser starts downloading static files such as images, HTML pages and other multimedia content. Their browser saves all these files so it doesn’t have to re-download them every time you visit the site in the future. 

While this helps with the speed of your browsing, it is recommended that you clean up your cache data once in a while so the files don’t become too bulky and reduce the performance of your browser.

Server-side Caching 

Server side caching refers to the caching protocol employed by your WordPress server to save temporary files. There are four possible protocols for WordPress Caching; 

  • Page caching 
  • OPcode caching 
  • Object caching 
  • CDN Caching 

Page Caching 

Page caching occurs when your caching plugin – like WP-Optimise – saves the dynamically generated HTML files on your server’s hard disk (RAM) after the first time it is loaded. Whenever there is another request for that page, your server produces the previously generated data.

OPcode Caching 

When a PHP file is loaded on the website, OPcode caching saves the compiled PHP code. For a PHP code to execute, it must be generated and compiled by the PHP compiler. OPcode caching saves the initially generated code on the server’s RAM, to save time upon subsequent requests. 

Object Caching 

Object based caching saves database queries after the first time they are requested. This way, it reduces PHP execution time and load time when the query is requested again. Since WordPress is a content management system that is reliant on databases, object caching seeks to reduce the load on the database and reproduce previously loaded content faster. This is crucial for high traffic websites. So crucial that WordPress has its own internal caching system that can be enhanced with a third party tool.

CDN Caching 

CDN (content delivery network) caching refers to the process of storing web content in proxy servers that are much closer to the end user. By using proxy servers, CDN caching helps your website to deliver content much faster. 

How does WordPress Caching improve your WordPress site speed and performance?

WordPress caching increases the speed of your website in three primary ways

Moves files to “recent memory”

You may be aware that computers and computer systems are built to mimic the brain. Caching is a prime example of that. 

When you try to remember an event from your childhood, it takes a while before you fully recollect the details. However, if you try to remember that same event days later, you remember the details almost at once. This is because your brain moved the event to a recent memory. It may surprise you to learn that you are not remembering the event, but you are in fact remembering the last time you remembered the event. 

Caching adopts this same principle by storing previously loaded web elements in a “recent folder.” As a result, your web pages load faster when they are requested. 

Saves files closer to the end user

Another way caching increases the speed of your website is by delivering content that is closer to the user; either from a server close by or from the user’s hard disk. This is a combination of client-side and server-side caching. 

Compress images 

Caching plugins like WP-Optimize give you the option of compressing your images. Bulky images take more time to load which can slow down the overall speed of your website. With cache plugins, you can manually or automatically compress images to reduce load time.  

How Caching boosts performance of your WordPress website 

Caching plugins don’t only increase your load speed, but they reduce the workload on your server. The following are the ways by which caching improves your website’s performance

Improves user experience 

Consumer attention span reduced from 12 seconds to 8 seconds in just 16 years from 2000 to 2016. There’s an explanation for this; technological advancements, intense competition and over stimulation of the mind from smart devices are the most significant culprits. 

This now means that you have only a few seconds to make an impression or lose the user to a potential competitor. Research suggests that slow websites are a huge turnoff to modern day internet users. 

There is also a correlation between higher bounce rates and slower pages, which means the longer it takes your page to load, the higher your bounce rate. The ideal page load time is under 2 seconds. A load time beyond 3 seconds can increase page abandonment rate by up to 87%.  

Improves ranking 

Website speed is a performance and ranking factor for search engines. In recent times, search engines like Google have begun to penalize slow websites. Websites with longer page load times are eventually pushed farther down the pecking order and replaced by faster websites. 

Google prioritizes user experience as a ranking factor and site speed is a crucial aspect of the UX. When users get disappointing experiences from the websites search engines direct them to, it reflects poorly on the search engine. Users are then less likely to trust the search engine results if that trend continues. 

Boosts content availability 

Several factors affect whether or not your website will load for a user. Frequent network interruptions or network congestion for example, are two of those factors. Since WordPress dynamically generates content for the user, this could greatly affect the performance of your website for that user. 

Caching solves this problem by providing an already generated page for the end user. This way, you won’t lose a potential or active customer to a poor network connection.

Cleans your database 

Caching plugins like WP-Optimize work to clean your database by de-fragmenting MySQL tables and clearing data like trashed comments, expired transient options, pingbacks, etc. This process is important because without it, your website’s performance and speed reduces overtime. 

Conclusion

Chances are that you may never get to notice how your website interacts with every end user. You can’t tell what happens when people try to access your website from halfway across the world. But what you can do is ensure that your WordPress site’s performance and speed are optimal at all times. With WordPress caching, you don’t have to lose sleep worrying about all that. Install a reputable plugin like WP-Optimize, and buy yourself some time to focus on other aspects of your business. 

The post WordPress Caching guide: How does it improve your site speed?  appeared first on UpdraftPlus. UpdraftPlus – Backup, restore and migration plugin for WordPress.

WP-Optimize release latest 3.1.9 update

The latest update for WP-Optimize 3.1.9 has now been released. As well as lots of fixes and tweaks, there are several new features included. The first of these new features is the ‘Power Tweak’. This Premium feature allows you to change the meta_key field length and create a new index. This can significantly speed up database requests on websites with large post_meta tables. Power tweak works by tweaking the table’s schema to enable indexing. 

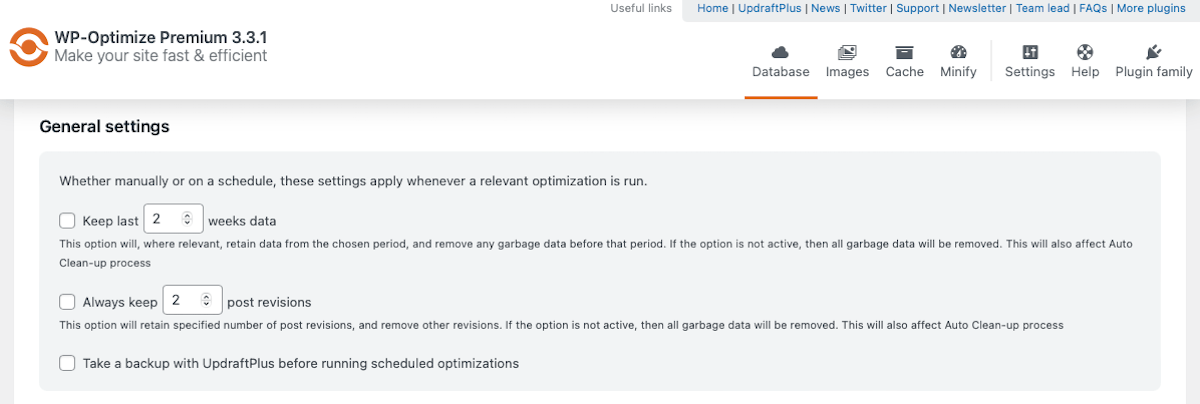
The second new feature we have included in this release is the ‘Automatic backups’ feature. When using the new automatic backup feature, users can now use UpdraftPlus during scheduled optimizations. As such, database backups with UpdraftPlus can now run before automatic scheduled database optimization. The third new feature in this update is the ‘Keep last X revision’ update. This feature allows you to delete post revisions, but now gives you the option to keep a specified number of revisions. Before this update, users could only keep revisions by time setting only. This change gives users more flexibility and increased safety when making post revisions. . 
The updates to WP-Optimize 3.1.9 are available now and also includes the following:

  • FEATURE: Power Tweak – Change meta_key field length and create new index
  • FEATURE: Premium – Automatic Backups using UpdraftPlus during scheduled optimizations
  • FEATURE: Keep last X revisions
  • FIX: Overlapping header notice in mobile view
  • FIX: Cache – Wildcard not working in cache exclusions
  • FIX: Prevent error in htaccess when mod_header isn’t available
  • FIX: PHP Fatal error on deleting plugin
  • FIX: PHP 8 Issue: loadAsync JS error
  • FIX: RankMath breaks robots.txt
  • TWEAK: Bypass minify when editing translations using TranslatePress
  • TWEAK: Purge minify cache from front end
  • TWEAK: Minify – Prevent cache directory creation while disabled
  • TWEAK: Add Google Fonts API version 2 support
  • TWEAK: Minify – Save all tab content settings changes with single Click
  • TWEAK: Improved optimization preview
  • TWEAK: Filter the list of preloaded URLs
  • TWEAK: Update seasonal notices
  • TWEAK: Bump WP version requirement to 4.5+

The post WP-Optimize release latest 3.1.9 update appeared first on UpdraftPlus. UpdraftPlus – Backup, restore and migration plugin for WordPress.

How to delete unused images in WordPress using WP-Optimize

How to delete unused images in WordPress using WP-Optimize


How it works

WordPress stores images in two parts:

  • The image files are stored on the server, typically in the ‘wp-content/uploads’ directory of the site.
  • A record of the image is then stored in the database, in the Media Library. This record also includes other data related to the image, such as the image tile, description or alt-text.

When removing an image, both the image files and Media Library record will be deleted.

Removing Unused Images

Open the ‘Images’ tab in the WP-Optimize Premium admin page and press the “Unused images and sizes” tab.

To scan your website for unused images, press the “Scan website for unused images” button. WP-Optimize will now scan for unused image files, found both in the Media Library and the ‘wp-content/uploads’ directory, that are not attached or embedded in any posts or pages.

You will now be presented with all the unused images that are on your site. To delete these images, either individually select the images by clicking on the images to highlight them, or press the “Select all” button to delete all unused images.

Once you have selected all the unused images you want to delete from your site, scroll down and either choose “Move selected images to trash” or “Delete the selection permanently”. WP-Optimise will then delete all copies of the selected image file plus any record in the Media Library.

You will receive a notification that your images have now been deleted.

Removing Images by size

You can also choose to remove unused images by size, but please note that removing registered image sizes is for experienced users, and care should be taken that the image size in question is not used on the site.

This tool shows both all registered image sizes, and image sizes that are currently not in use.

The ‘Unused image sizes’ section shows a list of all image sizes that are present on the site. This includes sizes for images that are in use. Deleting a registered image size will remove all images of that size from the uploads folder, including any that are in use.

In this case, the Media Library record will only be deleted if all copies of an image have been removed.

The ‘Unused image sizes’ section shows any image sizes that are currently not used by any images on the site.

Select any image size (from either section) that you wish to remove, and press ‘Remove selected sizes’.

Restoring images that were moved to trash

If you are not sure if you might still need the image, you can send it to trash, instead of deleting it permanently. You can view and restore these images by pressing the “view trash” button. 

Here you can restore any trashed images you want to keep by highlighting them and pressing the “Restore the selection” button. These images will now be sent back to your image library. 

We recommend taking a backup of the site before performing any optimisation with WP-Optimize Premium. WP-Optimize integrates with our backup plugin, UpdraftPlus. If UpdraftPlus is active on the site, the option to take an automatic backup before images are removed will be displayed in the tab.

The post How to delete unused images in WordPress using WP-Optimize appeared first on UpdraftPlus. UpdraftPlus – Backup, restore and migration plugin for WordPress.